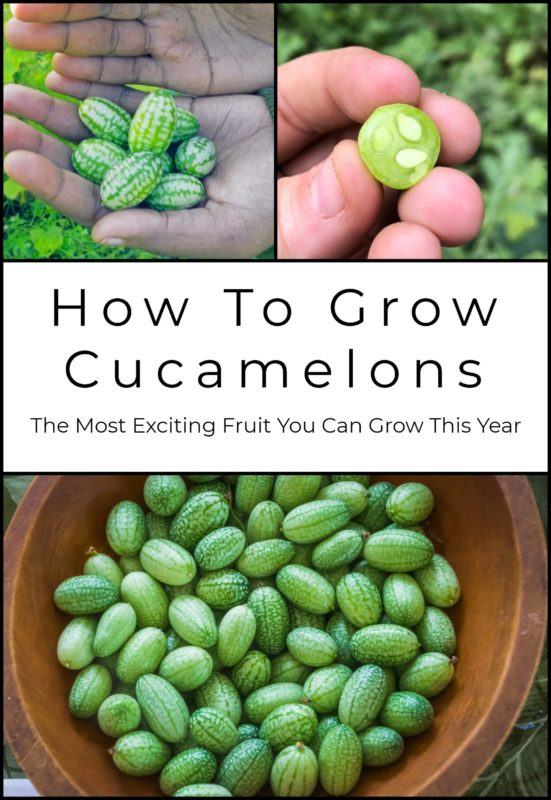
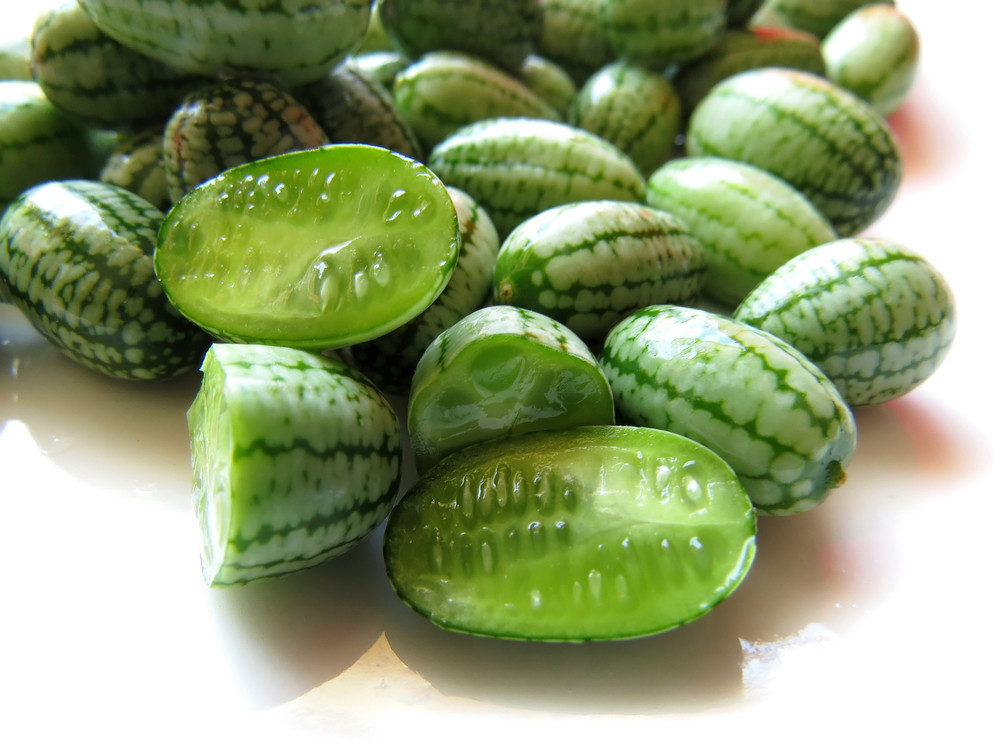
While most Americans have never heard of cucamelons, this fruit is definitely one you’ll want to know a lot more about.
Also referred to as “Mexican sour gherkin,” or its most common name in Spanish, “sandiita” (little watermelon). It actually has a slew of other monikers in local dialects and Native American languages, most of which translate to “mouse melon.”
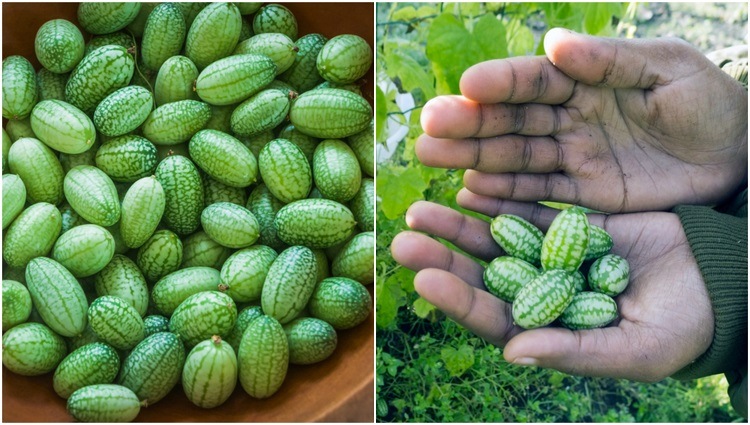
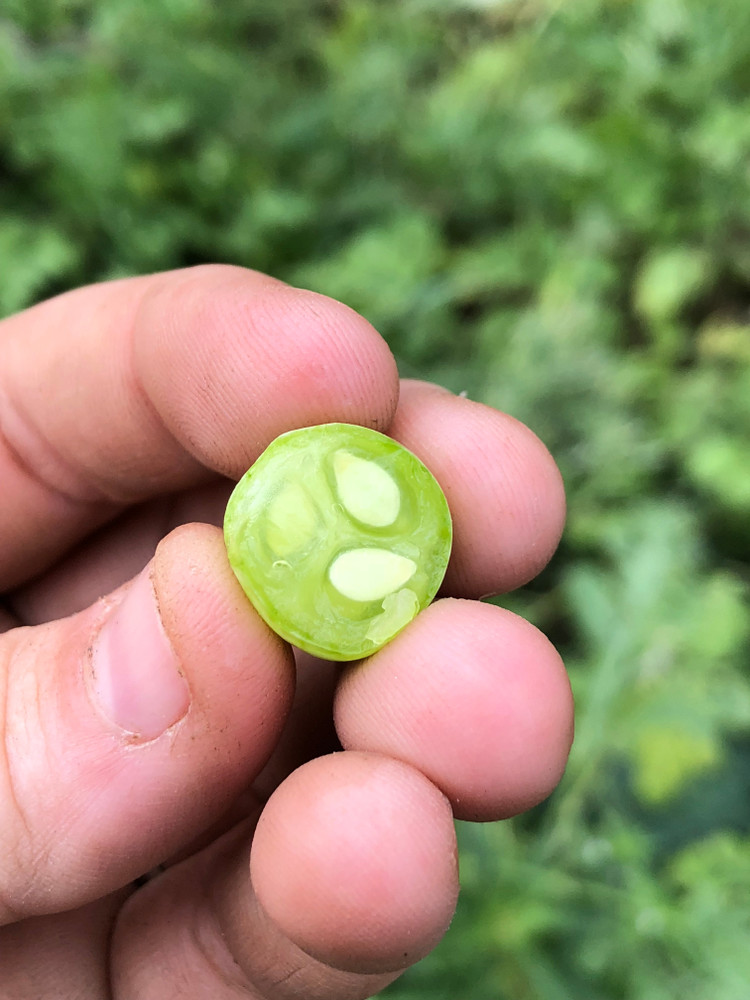
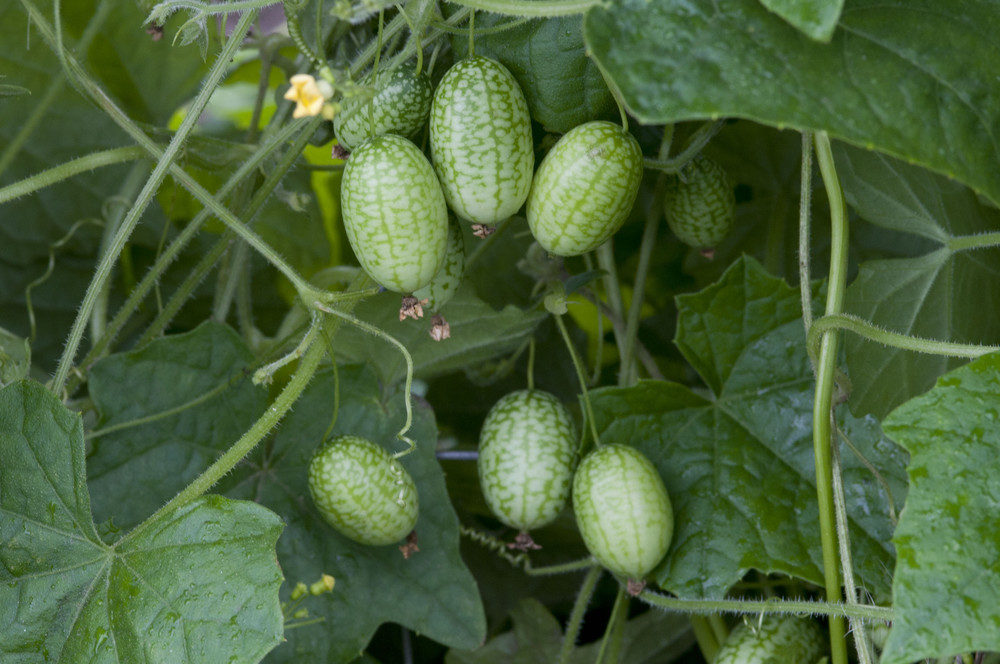
This cute fruit is the size of a grape, looks like a mini-watermelon and taste like cucumbers and lime.
The sour fruit grows on a thin vine and is surrounded by ivy-like leaves.
While they’re a bit bizarre looking, cucamelons aren’t some strange genetically-modified hybrid, but a delicacy from Central America that’s been eaten since pre-Columbian times and are a staple in Mexican diets.
Health Benefits of Cucamelons
Just because cucamelons are small doesn’t mean their nutritional value is low.
In fact, they’re said to be on their way to becoming the next trendy superfood, abundant in vitamins and minerals, antioxidants and fiber, while also being low in calories.
Their rich nutrients are said to help lower the risk of heart disease, stroke, and cancer as well as to guard against premature aging by helping to protect and rejuvenate the body’s cells, tissues, and organs.
Melons like these contain a high level of lycopene, a carotenoid known to improve cardiac functioning, as well as beta-carotene, known for its remarkable antioxidant and anti-aging properties that help prevent age-related cardiac conditions and much more.
The combination of nutrients like vitamin C, potassium and carotenoids, help to lower bad cholesterol levels, providing further protection to your heart and cardiovascular system. Its phytonutrients also support proper functioning of the eyes and just about every internal organ.
Why You Really Need To Grow Cucamelons
In addition to their powerful nutritional benefits, this adorable, tasty fruit is just something you’ve got to try.
Unfortunately, your local grocery store or farmers market likely stocks things like watermelons and maybe even round, yellowish lemon cucumbers, but the odds of it offering cucamelons is pretty slim.
That’s why growing them in your garden is the best way to go. You can enjoy them anytime you like and have fun experimenting with them in all sorts of recipes too.
This exotic plant can be a great part of your garden – they’re one of the easiest plants to grow as they suffer from very few pests, don’t require fancy pruning or need the cover of a greenhouse.
Cucamelons are very drought resistant, even more so than cucumbers. While they’re well-known in Mexico and throughout Central America, they can be found growing wild in some Southern U.S. locations, though you can grow them pretty much anywhere, just like its relative, the cucumber.
11 Steps To Growing Perfect Cucamelons
1. Purchase the seeds
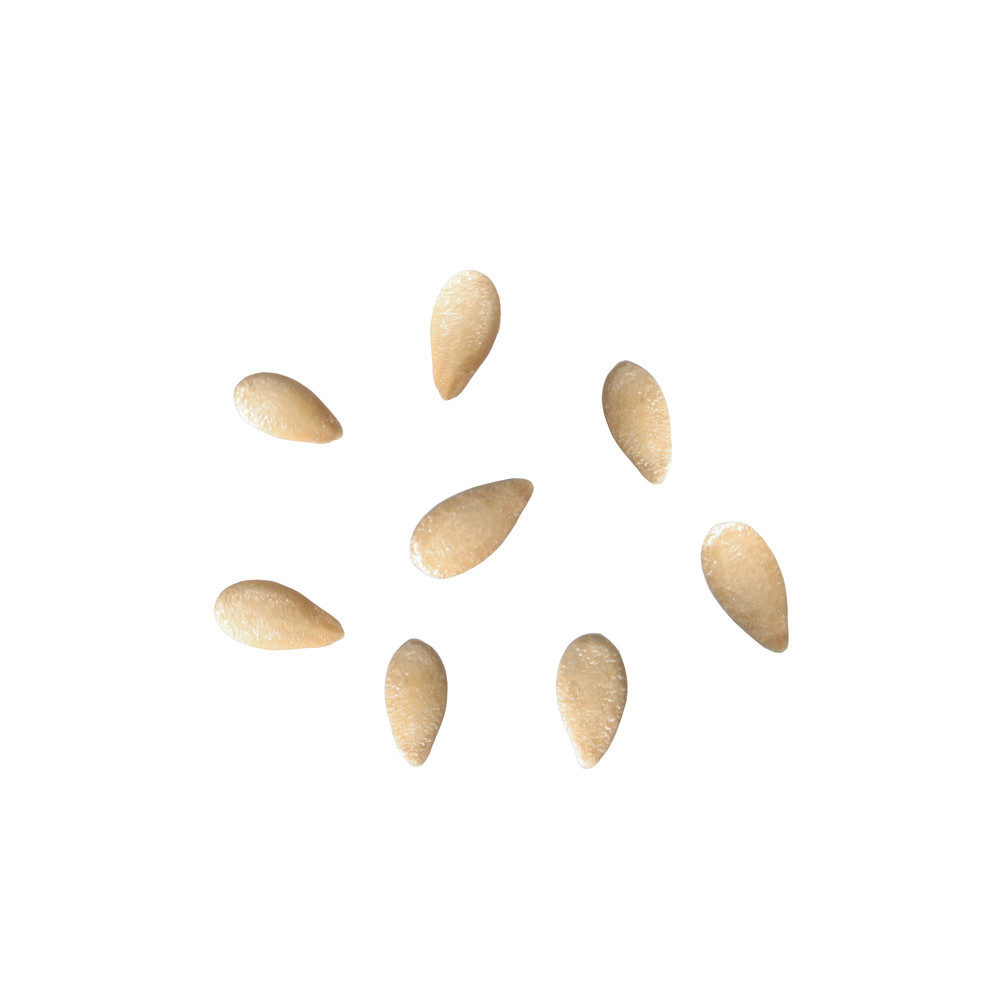
As cucamelon seeds aren’t exactly easy to find, you’re unlikely to be able to buy them at places like your local co-op or home improvement store. Your best bet is online – you shouldn’t have to pay much more than you would for any other type of seed.
Amazon have a number of sellers of cucamelon seeds, but the best reviewed is Seeds Needs Cucamelon Seeds available from here.
Keep in mind that the crops that will do best in your garden are those grown with high-quality seeds that have been carefully maintained and that match your growing conditions. Where organic or chemical-free is offered, buy it. In most cases, you’ll get what you pay for.
Since the seeds are not easy to come by, when you have established plants and fruits, be sure to save some of the seeds.
All you have to do is pick up a ripe fruit that’s fallen to the ground and place it somewhere cool. In about two weeks, you can slice it open and scoop out the seeds. Keep your seeds in a jar filled with water for a week, and then rinse them and allow them to dry on paper towels in a cool spot. Once dry, store them in a paper envelope.
2. Climate considerations
Cucamelons are grown as annual vegetables in most areas, although they are technically perennials.
They require a long growing season with at least 65 to 75 days of warm, frost-free weather and soil temperatures that are between 75 and 85 degrees Fahrenheit to bear fruit.
If you live in a cooler area, you can grow them in pots and move them indoors to a bright, warm room when nighttime temperatures drop below 50 degrees.
3. Start cucamelons indoors
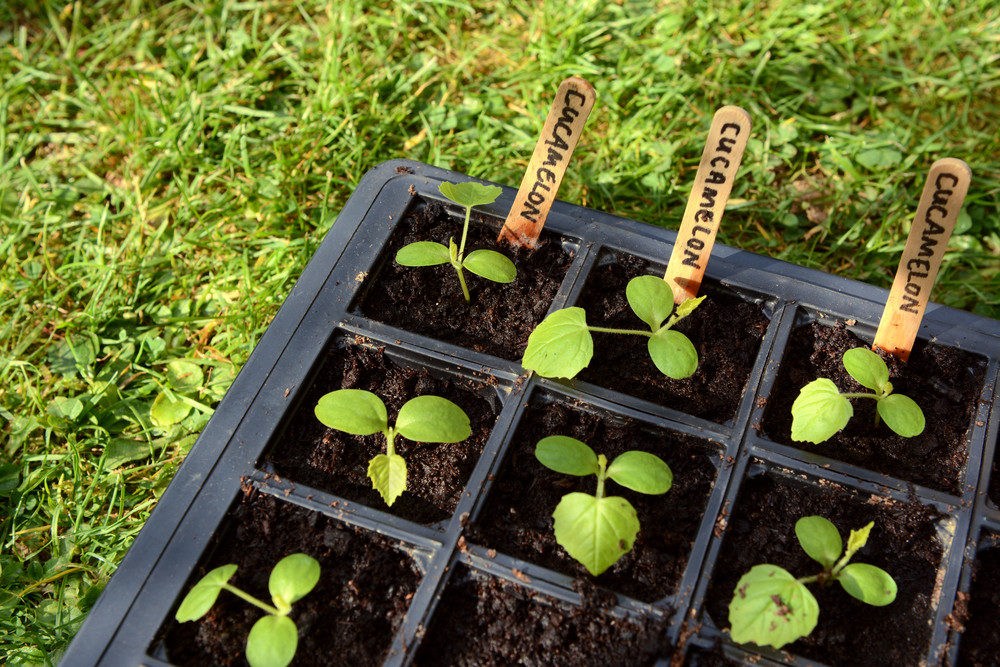
Cucamelons are best started indoors, about 6-8 weeks before any risk of frost is gone.
While they can be planted directly into the ground after danger of frost has passed, it’s best to start them indoors and then transplant them outside after all danger is gone.
Another option is to plant one seed in each pot, about a half-inch deep, and place them in a greenhouse at temperatures around 72 degrees Fahrenheit.
Have patience, cucamelons are slow starters, especially when compared to growing cucumbers.
They need more time to germinate, and it can take as long as three or four weeks before you start to see those little green shoots appear.
4. Choose your planting location
Cucamelons like full sun and rich, fast-draining soil. Choose a growing site that gets full southern exposure, and allow at least 12-square-inches of space for every plant.
At least six hours of direct sunlight are required on a daily basis to keep your plants healthy and productive. The more sunlight, the better off they’ll be.
5. Install a wire cage or trellis
As vining plants that can climb as high as 10 feet , these Mexican miniature watermelons need a support structure to keep their stems and fruit off the ground, so install a small trellis or tomato cage for them to grow on.
It will also help you to get beautiful thin vines that are surrounded by leaves and have an attractive, ivy-like appearance.
6. The right soil
Like the majority of other fruiting garden crops, cucamelons need lots of nutrition and very good soil drainage to produce at their maximum.
The soil that they will be grown in should be amended with compost or aged manure in order to provide nutrition that will last all season.
You can amend lean or porous soil with a 2-inch layer of compost worked into the top 6 to 8 inches of soil prior to planting. By placing a tablespoon of 6-10-10 analysis fertilizer into each hole you plant, it can provide an added nutrient boost to the soil, while adding small porous lava rocks or perlite can help improve soil drainage.
Once established, cucamelons need no supplemental feeding, other than a light, 3-inch side-dressing of compost every month, beginning about two months after planting.
7. Water needs
A steady supply of moisture is necessary for good fruiting in cucamelons.
You should provide an inch of water every five to seven days during the summer months, wetting the top 6 to 15 inches of soil every time. When the weather is very hot and dry, increasing water to twice a week.
If you’re in an area subject to fog and cool weather, be sure to monitor the soil during prolonged periods that lack sun – only water if the soil dries out in the top once inch.
In warm, inland areas, it’s best to spread about a 3- to 4-inch layer of lightweight mulch around each plant, keeping it from the base of the stems.
Mulch can also help by regulating moisture loss while keeping weeds from invading.
8. Pest issues and re-seeding
Incredibly, cucamelons are not only extremely tolerant to rough conditions, they’re virtually ignored by all pests and are resistant to disease too. Even the birds won’t mess with them. That means pest control is not really an issue you need to be concerned about when growing these plants.
Much like arugula, cucamelons reseed famously on their own, which makes them an excellent addition to a permaculture garden or food forest.
9. Training the growing vines
As the growing vines of the cucamelon won’t exactly fill up your trellis by themselves, and those long tendrils tend to grasp onto just about anything they can, pulling the vines in all sorts of directions.
You can train them by gently wrapping the vines throughout the trellis in anyway you’d like.
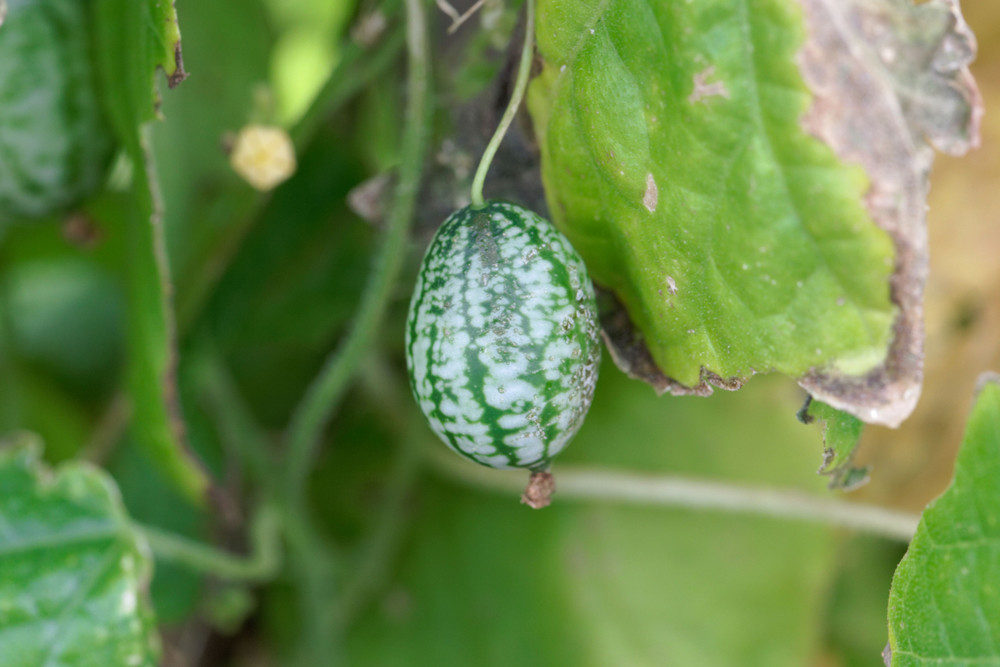
10. Harvesting your cucamelons
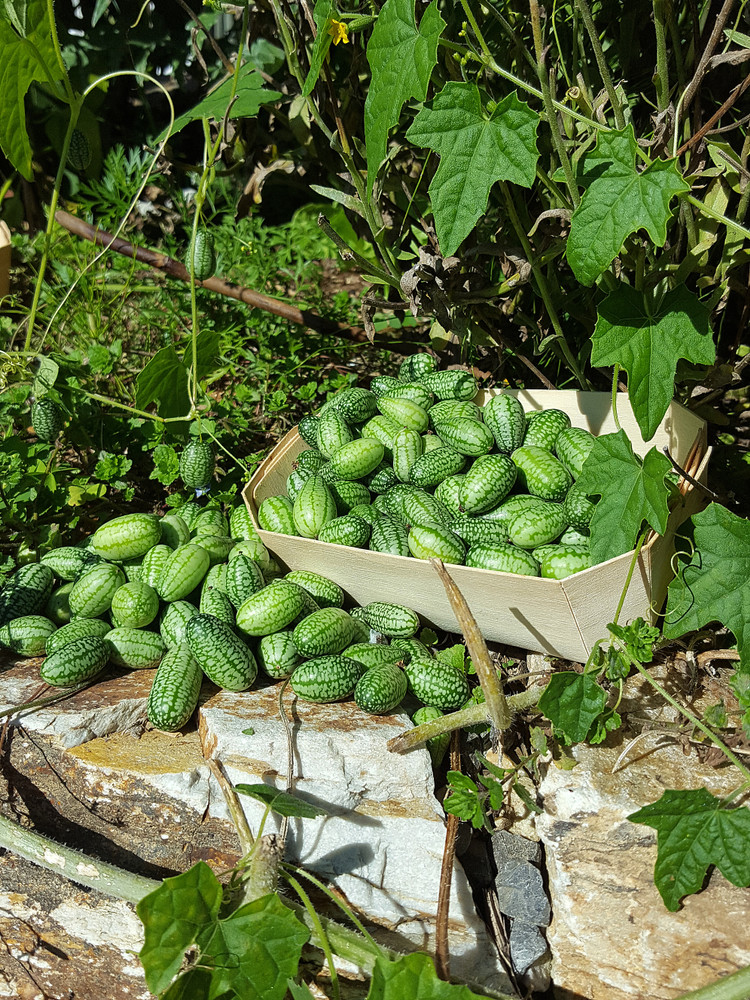
Once flowering has begun, those little cucamelon fruits won’t be far behind.
Harvest the fruit when they have reached a nice plump size, about the size of a grape, nice and firm, and about one to one and half inches in length.
Pick the first few at a somewhat earlier stage to force more fruit production.
After pollination, it takes about 2-3 weeks for the cucamelon fruit to reach a harvestable size.
Harvest your cucamelons by simply picking them off without ripping the plant apart. If in doubt use a pair of small scissors.
If you harvest carefully, they should keep growing for quite a while, and you should have a bountiful crop from July to about mid-November.
If you are new to this and grow them from seed, don’t expect a very large plant in the first year. A plant grown from a tuber will grow at a much higher pace than a seedling, but you should still expect several handfuls of fruit from one plant in its first year.
Be sure to avoid disturbing the tubers when cutting out foliage during the fall. They’ll stay underground and wait for the heat of next spring.
11. Pruning
As we mentioned, there is no fancy pruning needed, but you will need to do some pruning because as the season progresses, the vines eventually create a thick mass of foliage on the trellis.
When that starts to happen, some of the leaves will become choked off from sunlight and will begin to yellow. Trim off any dying leaves.
How To Use Cucamelons
Cucamelons can be used in a variety of dishes.
They’re great in stir-fries, salsas and salads, speared and placed into a martini glass, or simply eaten raw or sprinkled with dried herbs.
You can also toss them with sliced peppers and olives, along with a drizzle of extra-virgin olive oil.
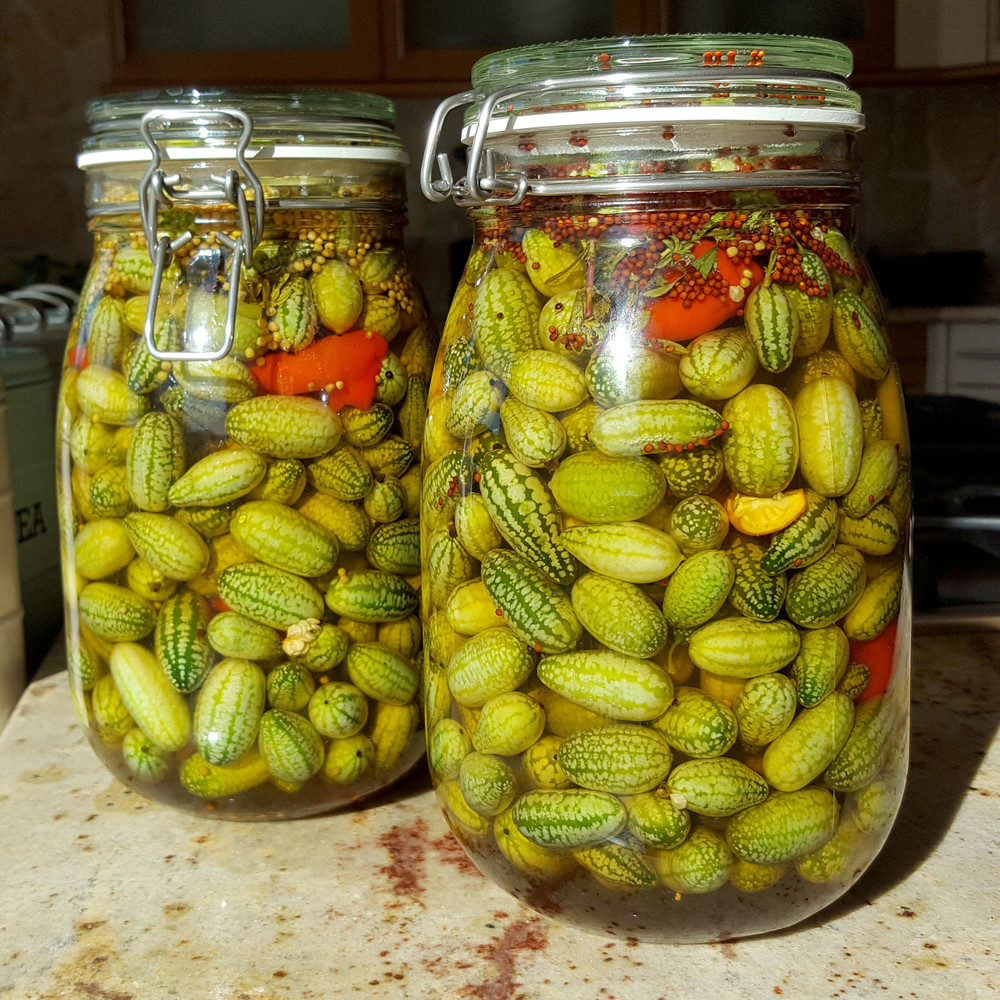
They can be pickled too – just like you would pickle cucumbers. Preparing pickled cucamelons is so easy – they’re best when pre-salting them, as you’ll get a more crisp result and the pickling process will be a lot faster too.
Ready to start growing cucamelons?
Purchase these Seed Needs Cucamelon (Sour Gherkin) Seeds and follow the eleven steps above to get started!
Pin This To Save For Later