
Are fresh herbs not showing up in your dinners as often as you’d like?
Buying specialty greens at the grocery store quickly gets expensive, but devoting your backyard to a big herb garden isn’t easy either. And while herbs offer impressive health and flavor benefits, many of these perennial plants are notoriously unruly and can quickly take over your garden space.
The solution?
Establish a backyard herb spiral that lets you grow every herb you care about in a concentrated, visually pleasing way that naturally works to keep your plants healthier than they would be otherwise.
If you have a passion for permaculture but aren’t sure where to begin with your own yard space, building an herb spiral is a great place to start.
The project can be completed within a few hours of effort, and you’ll enjoy the benefits for your culinary creations for years to come.
What Is An Herb Spiral?
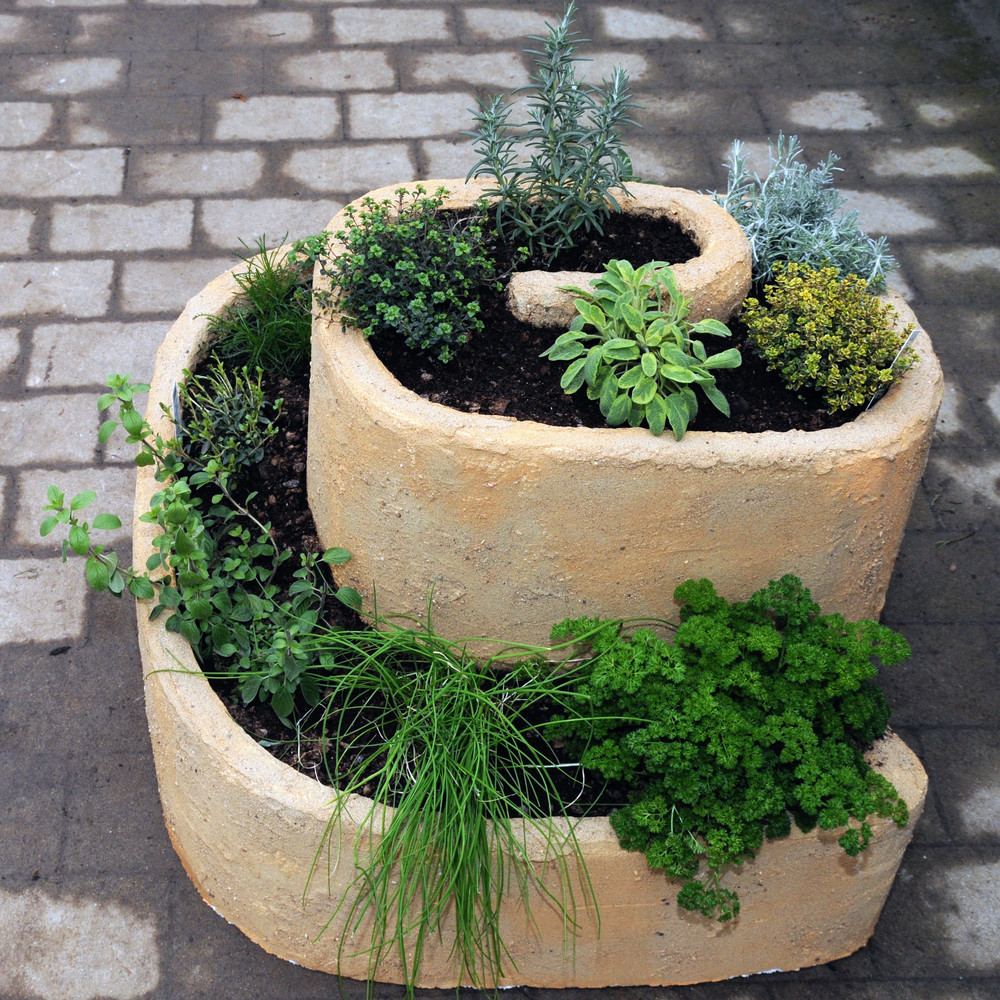
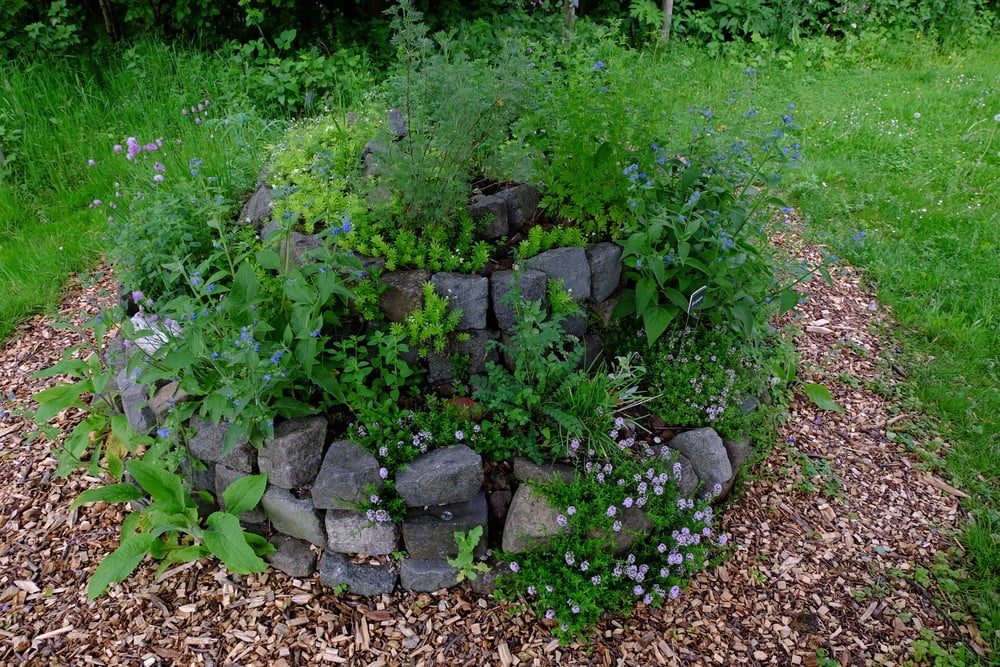
An herb spiral is nothing more than a space-efficient, multi-level herb garden that optimizes growing conditions for a variety of species. Picture a snail shell on its side, and you’ve got the idea.
For most designs, the spiral starts at ground level and gradually reaches up to a high point in the center of the bed. This creates a range of microclimates along the spiral that all have small yet significant differences in their temperature, exposure, and moisture level that are well-suited for different kinds of herbs.
The top portion of the spiral tends to have good drainage and full sun exposure, while lower parts stay more shaded and moist.
In this way, an herb spiral lets you pack an impressive amount of versatile growing space into a small portion of your backyard.
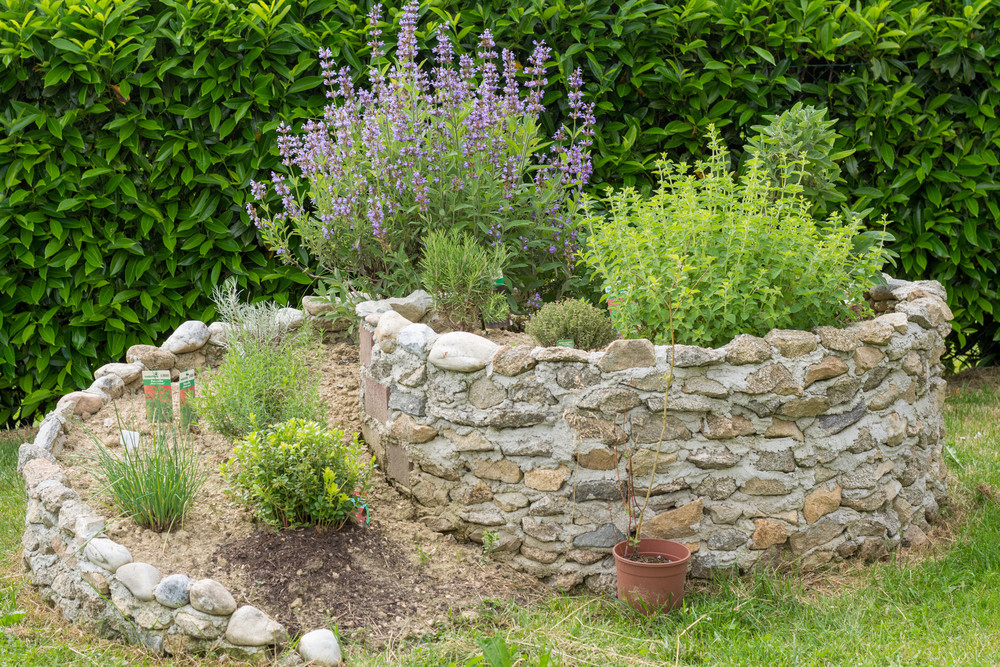
Most herb spirals are composed of bricks or stones, and quality soil is added to the interior to promote the health of your plants. It’s possible to make your spiral as large or small as you’d like, though a six-foot diameter tends to be the standard size.
Read Next: 10 Really Rare Herbs You Should Try Growing In Your Herb Garden
Benefits Of An Herb Spiral
Sure, a spiral-shaped planting space is visually pleasing, but is it merely a gimmick?
It turns out that there are plenty of reasons why creating your own herb spiral is one of the smartest ways to grow greens for your kitchen.
1. Provides An Impressive Array Of Microclimates
While you’d normally struggle to grow sun-loving Mediterranean species and cool-soil comfrey in the same garden bed, the twisting, elevated structure of an herb spiral makes it possible.
This improves the variety of herbs you can grow from home, which enhances your options for kitchen experiments.
2. Keeps Spreadable Herbs Contained
Have you ever planted a small amount of mint, only to have it quickly overtake your entire garden plot?
Herbs are notorious for their survival abilities, and without any control, many of these perennial plants can become the bane of your garden’s existence.
By planting potentially invasive herbs within an enclosed spiral instead, you restrict their growing space and prevent them from overtaking your yard.
3. Optimizes Water Efficiency
If you live in a region with strict water restrictions, creating your own herb spiral is a smart way to make the most of this scarce resource.
The spiral design naturally allows for optimal water efficiency, so long as you plant drought-tolerant species near the top and leave the moisture-lovers in the lower levels.
Best of all, the compact design makes setting up a drip irrigation system extra easy, which improves your water efficiency even more.
4. Mathematically Pleasing To Look At
Ever heard of the “golden ratio,” also known as the Fibonacci sequence? You can find this mathematical pattern throughout the natural world, and research shows that it’s one of the most visually pleasing designs to the human and animal eye alike.
Snail shells are a natural formation of this sequence, and designing your herb garden in the same model will add the benefits to your backyard.
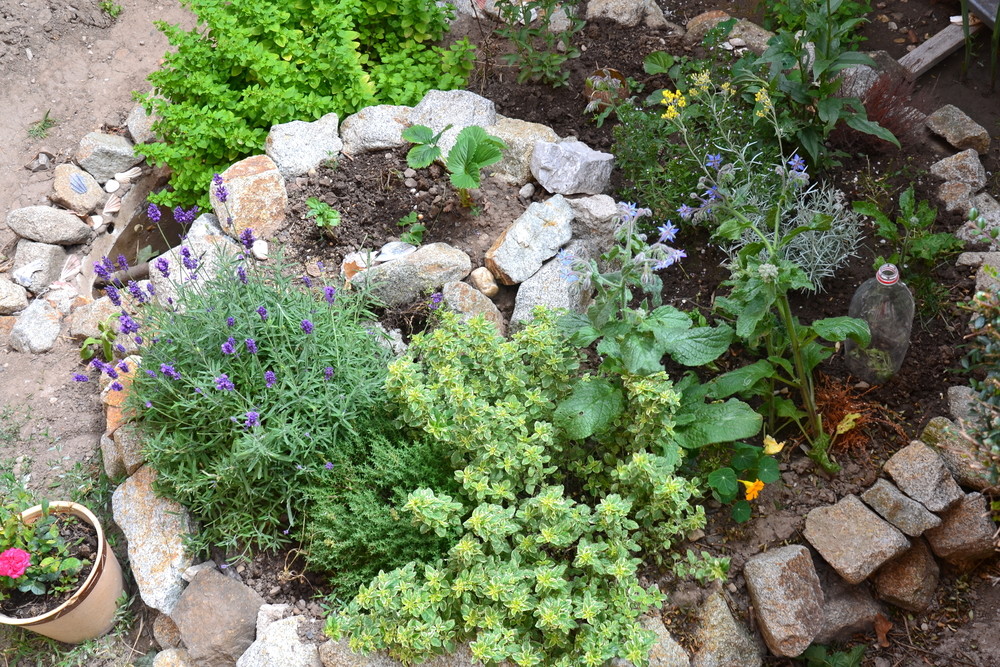
Likewise, many people find the rounded, three-dimensional design of an herbal spiral to be visually pleasing within a garden context, especially when it is built from natural elements like stones.
A well-placed herbal spiral can become a focal point in your yard, and it can balance out any harsh angles within your sightline.
5. Cost Effective
Home chefs already understand how expensive fresh ingredients can be, but growing your own is a smart way to save money.
A well-designed herb spiral can pay for itself in just one season, and your meals will be better from the access to fresh ingredients.
6. Convenient For Kitchen Gardens
For those with a limited area for establishing a garden, creating your own herb spiral lets you grow more in less space.
Thanks to its easily adaptable design, it’s possible to place an herb spiral exactly where you want it, making it a convenient option for directly outside your kitchen door.
7. Easy To Maintain (& Harvest From)
Bending over a bed to harvest your herbs might strain your back, but an herb spiral elevates your garden plants so they are easier to access.
In fact, it’s often possible to harvest from every plant in the spiral without moving more than a few feet in either direction. Likewise, keeping your garden within an elevated, contained space makes it harder for weed species to establish themselves.
8. Provides Habitat Space For Beneficial Creatures
It turns out that creating your own herb spiral helps more than just the humans who enjoy your cooking.
Stacked stones form ideal habitat space for lizards, spiders, and other creatures that love to snack on pests that can wreak havoc on your plants.
8 Steps For Designing Your Own Herb Spiral
Ready to start constructing an herb spiral? The process is easier than you think. While there’s plenty of room for creativity, it’s smart to follow the general outline of these steps to ensure you build a functional design that lasts.
1. Gather Supplies
To construct your herb spiral, you’ll need a quality soil mix (more on that later), mulch, and durable, slightly porous material to build the edges with.
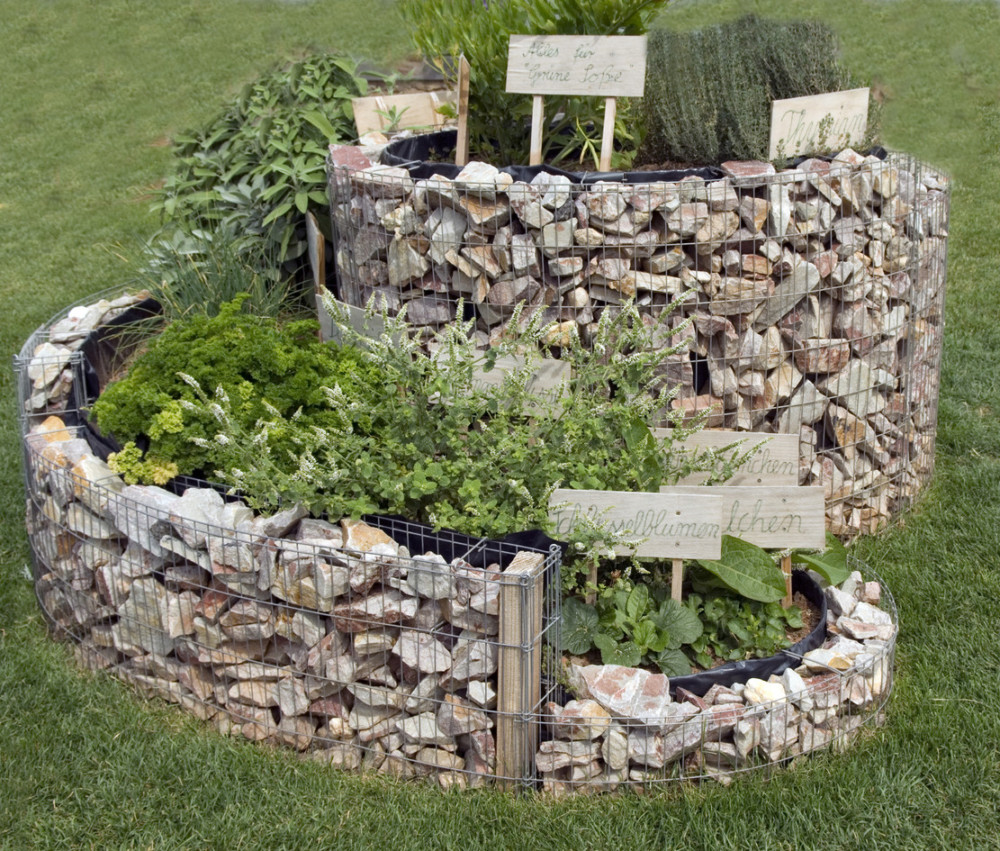
Fieldstones create a loose, less planned-looking aesthetic, though some people prefer the precision of using bricks. Some gardeners also construct their spiral with unsplit logs, bamboo, and even recycled materials like beer bottles.
Regardless, it’s smart to plan on about two cubic yards of material per six-foot diameter spiral (and 12 to 14 cubic feet of soil).
Some considerations to keep in mind: brick tends to be expensive, but it also produces a more stable, longer-lasting spiral. Likewise, fieldstones can be tricky to stack to the final heights in the center of the spiral.
2. Choose Your Size & Location
Determining where to place your spiral and how big it should be are important considerations. Keep in mind that you need to easily access the center of the spiral for maintenance and harvesting, so anything over six-foot in diameter might be difficult to deal with.
Likewise, too small of a spiral doesn’t produce the range of microclimates necessary for a variety of species.
Location-wise, look for a spot in full sun (or six hours of sunlight per day minimum) that’s easily accessible. You want your spiral to be in a place where you walk by it frequently so that you remember to maintain it.
It’s also critical to ensure your spiral is close to a convenient water source and to optimize its orientation. Traditionally, herb spirals are designed to open to the north so that the moisture-loving plants put there stay well shaded.
3. Design A Soil Blend
The quality of soil within your herb spiral will set your plants up for success, but different species have unique fertility requirements.
One strategy is to divide the spiral into “zones” and amend the soil in each section according to the planting plan.
For instance, the shade-loving plants at the bottom will do well with extra compost, while the center part should be supported with gravel to add structure and improve drainage.
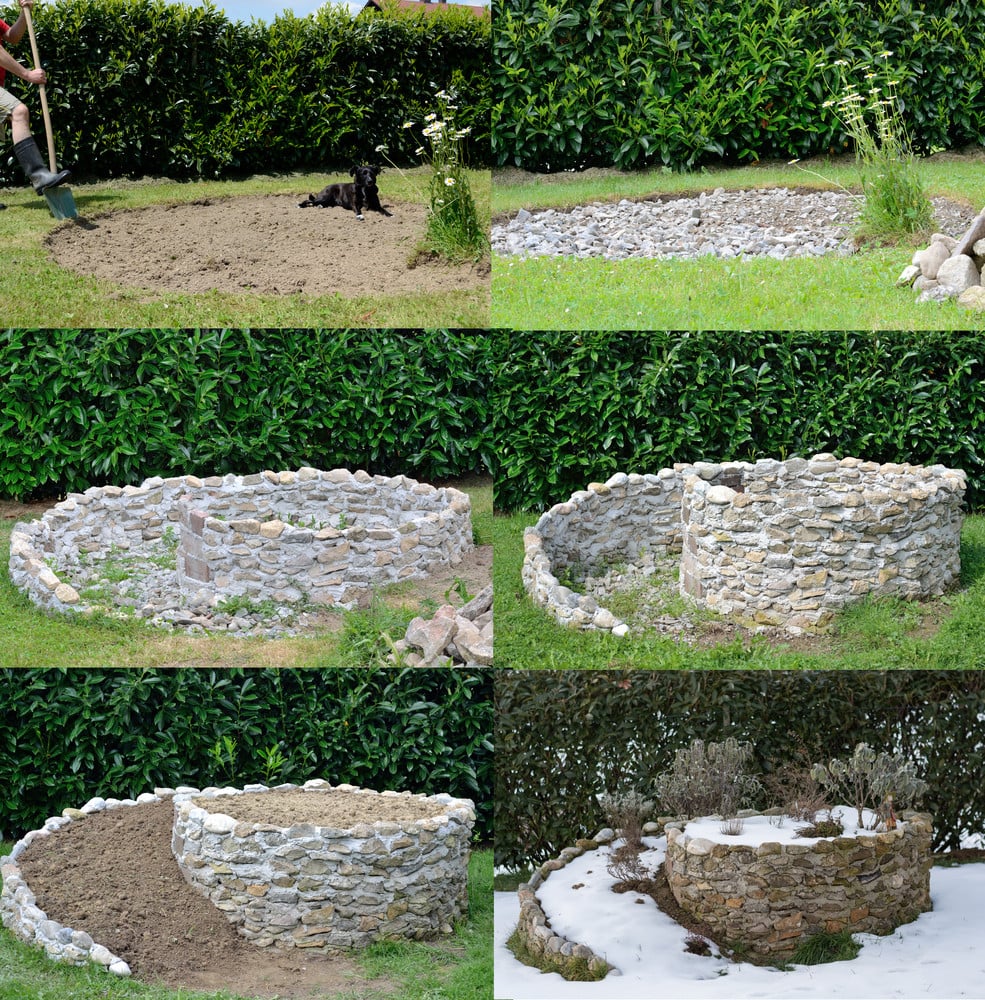
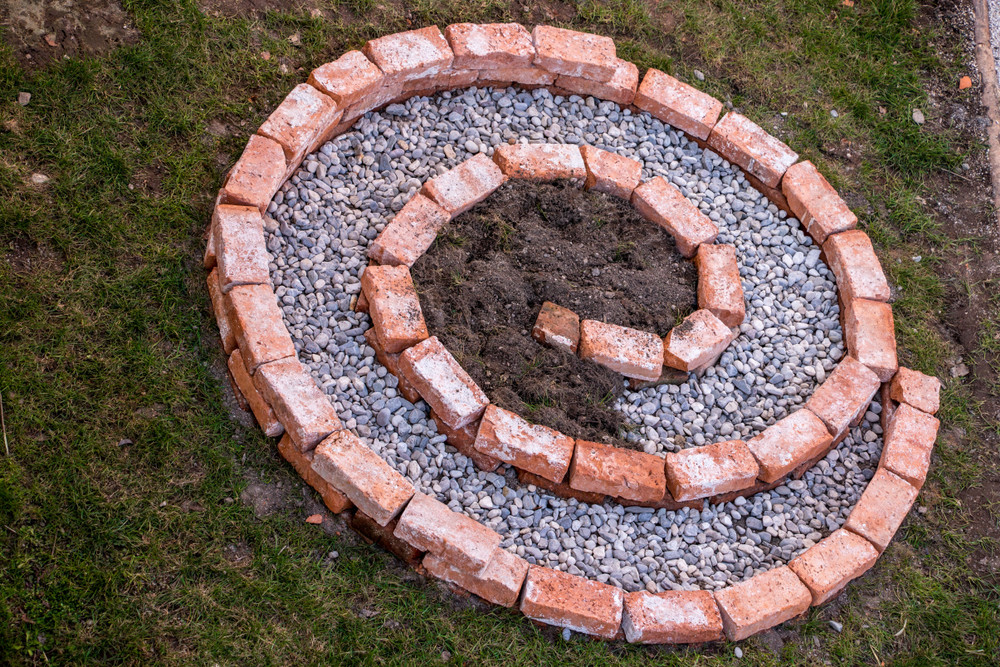
4. Mark The Outline Of The Spiral
Once your location is secured, you can mark the perimeter of your spiral with small stones or stakes. For a six-foot spiral, plan to create three levels from the coil, providing planting space that is 12 to 15 inches wide (less is okay if you plan to keep your plants small).
5. Stack Stone Along The Perimeter
If you’re content with your planning, start stacking your material of choice to form the walls for the spiral.
Place your stones, bricks, branches, or bottles around the base of the mound, working from the outside in. Fill the interior about a third up with dirt as you build up the walls so that you add support to the mound. As you stack your stones around the center, you can intersperse small rocks and gravel into the bottom to fill in cracks and add some weight.
The center of the spiral is the trickiest to construct because of the tighter turns it requires, but keep in mind that dirt will soon cover any imperfections in the design.
While it’s possible to make your spiral as steep as you prefer, it’s smart to aim for about 40 inches tall at the center point for a six-foot structure. Once it reaches this point, add your prepared soil to the places set aside for each species.
6. Cover The Soil With Mulch & Let It Set
Once your spiral is constructed, cover it with mulch to retain soil moisture and prevent nutrient leaching. Then, water the spiral thoroughly and let the rocks and soil settle for at least six weeks before adding your plants.
You might need to add more soil (removing the top layer of mulch first) during this time if the levels shrink down too much.
This stage is also a smart time to install a drip irrigation system, as you won’t mess with the plant roots in the process.
7. Build Small Pond At Base (Optional)
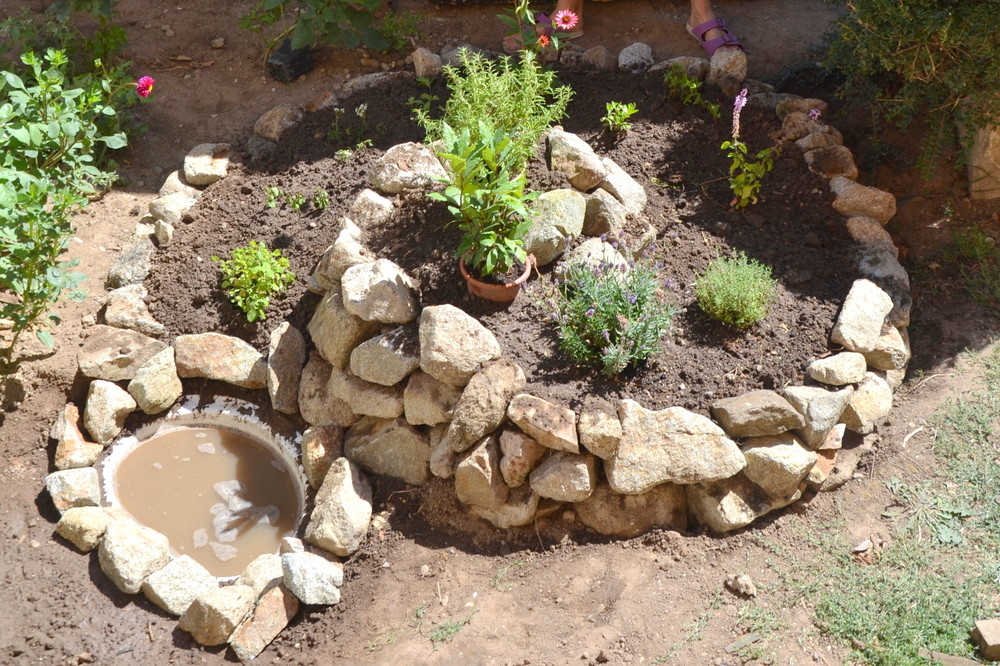
Want to add an extra dimension to your herb spiral? Consider building a small pond along the base to enhance your growing opportunities.
Water chestnuts and watercress work well, and you’ll also produce habitat space for beneficial birds and amphibians.
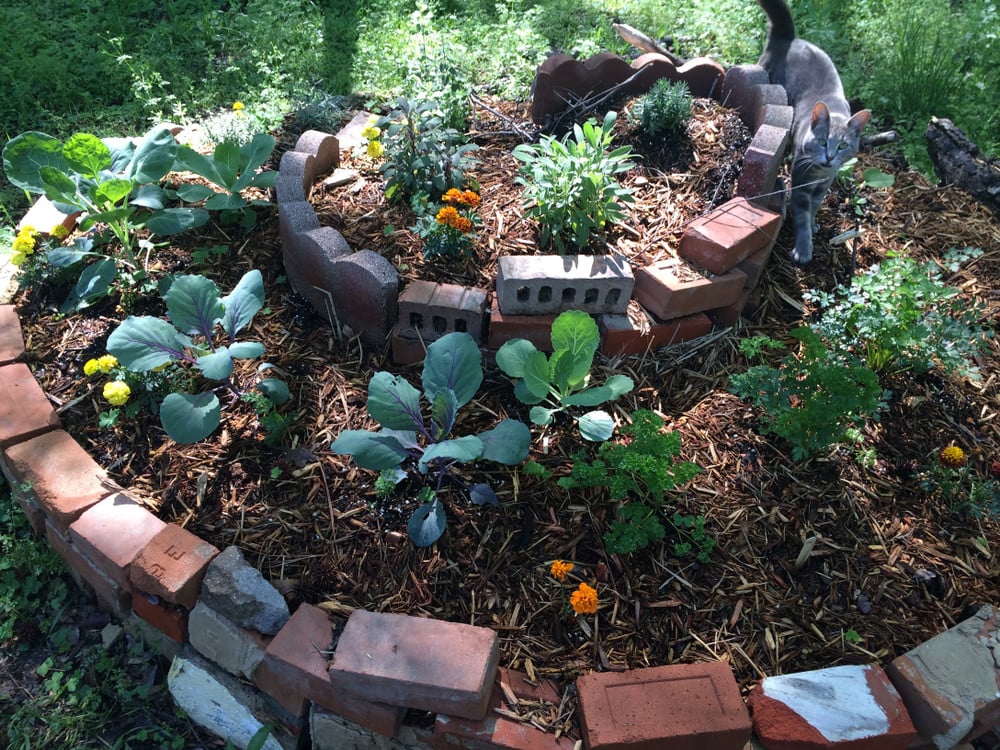
8. Add Plants To Your Herb Spiral
Once your spiral’s soil has settled, it’s time to add herbs to the mix! Stick with small plants at first, as they will soon grow to fill the space you’ve provided. Which plants work best where? Here’s a quick guide for taking full advantage of the different microclimates on your spiral.
- Dry/ Sunny/ Top – lavender, oregano, rosemary, sage, lemongrass
- Mid-level/ South-facing – basil, cilantro, dill, thyme, tomatoes
- Moist/Partial light – chives, chamomile, parsley
- Wet/ Shady/ North-facing – mint, comfrey, catnip, lemon balm
If you build a small spiral or create narrow planting areas, consider using dwarf herb varieties instead of standard ones.
Create Your Own Herb Spiral For Seasons Of Satisfaction
It might take some time and planning at the beginning, but constructing an herb spiral is a rewarding activity that will provide you with fresh produce long into the future.
Devote the time towards building yours today, and you’ll soon find dozens of ways to put your new herbal harvests to use.
Need some inspiration to get started? Check out our articles about making an herbal face steam and drying herbs for year-long use.
With a little creativity, you’ll be amazed at what you can do with fresh plant material.