Image Credit: US Department of Agriculture @ Flickr
The fleshy, fruiting bodies of the Kingdom Fungi, mushrooms can be found thriving on the mossy bark of trees and the shady soil beneath the umbrage of plants, preferring the dark and damp areas of the wild.
Unlike green plants that, through the process of photosynthesis, convert sunlight, water, and carbon dioxide into food, mushrooms receive their energy and nutrients wholly from metabolizing dead or decaying organic matter or by absorbing nutrients from the roots of a living plant.
The life cycle of the typical mushroom begins with the mycelium, a fungal colony that consists of white spider web-like fibers that can be found in soil and other substrates.
It spreads in search of water and nutrients and, once an adequate environment is sourced, above ground a small button the size of a pinhead emerges.
Growing to resemble an egg and usually swathed a temporary layer of mycelium – also called the “universal veil” – as the mushroom expands it will eventually break free of its veil to reveal a hardy stalk and a rounded cap with gills on the underside.
When a mushroom matures, the gills release millions of spores that are carried with the wind to germinate and form a new mycelium.
There are more than 20,000 known types of mushrooms in the world, but it is estimated that there are somewhere between 53,000 and 110,000 varieties that have yet to be discovered.
Ranging from edible to toxic, medicinal to psychoactive, mushrooms are weird, wondrous, and fantastical organisms with the power to heal, the ability to kill, and the capacity to provide magical experiences.
Nutritionally, the edible varieties of mushroom are low in calories but dense in nutrients.
They are an excellent source of B vitamins, like riboflavin, niacin, and pantothenic acid. When exposed to sunlight, mushrooms become enriched with high amounts of vitamin D.
Also a good source selenium, ergothioneine, potassium, and copper, studies on mushrooms have yielded promising results in boosting immune system function, as an anti-cancer therapy, and in promoting good heart health.
There are many more benefits of eating mushrooms; read them in full here.
While there is a bit of a learning curve, you’ll likely find that growing your own supply of fungi to be supremely entertaining and satisfying. Home-grown mushrooms are often tastier and more nutritious than store-bought, and you’ll save a heap of money if you happen to have a penchant for the pricier gourmet varieties.
As one of the foods that can be grown indoors, year-round, mushroom cultivation is quickly catching on as an interesting and less conventional way to grow food.
Here’s how to do it:
How to Obtain Mushroom Spawn
If this is your first attempt at growing mushrooms, you may want to purchase a kit to become better acquainted with basics of fungiculture.
Mushroom kits like this one are complete, and include spawn with a growing medium.
All you need to do is mist it with water daily and watch the mushrooms grow.
Once you’re ready to move on to a more sustainable operation, you can purchase some starter mushroom spawn online at retailers like Fungi Perfecti and Field & Forest.
Sold in grain, sawdust, peg, or dowel form, mushroom spawn is any material that has been cultured with a specific strain of mushroom mycelium.
Since the spawn is “live”, it must be transferred to an appropriate growing medium as soon as possible, so it’s best to prepare your site and substrate before you purchase spawn.
Growing the Decomposers
Mycorrhizal fungi, like truffle, morel, porcini, and chanterelle, obtain their nutrients from the living roots of trees and other plants, and can be difficult to cultivate at home.
Saprotrophic mushrooms, on the other hand, feed on decaying organic substances and can be easily grown indoors and out.
To maximize the chances of success, it’s important to match the mushroom spawn with the right substrate:
Wood Logs
Inoculating hardwood logs with mushroom spawn will yield a bountiful harvest for many years. Here are a few of the more popular wood mushroom varieties:
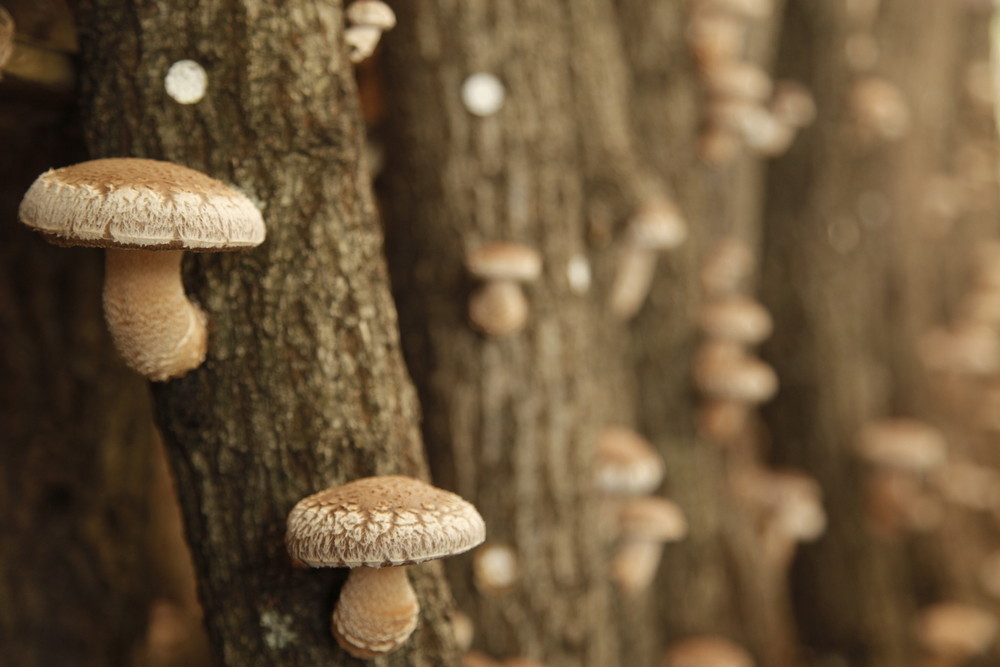
Shiitake (Lentinula edodes) –
The caps of the shiitake mushroom are meaty and filling with a distinctive smoky flavor. The recommended woods to grow shiitake are oak, sugar maple, alder, American beech, sweetgum, and ironwood. Preferring temperatures between 50-80F, shiitake can take anywhere from six months to two years to produce edibles.
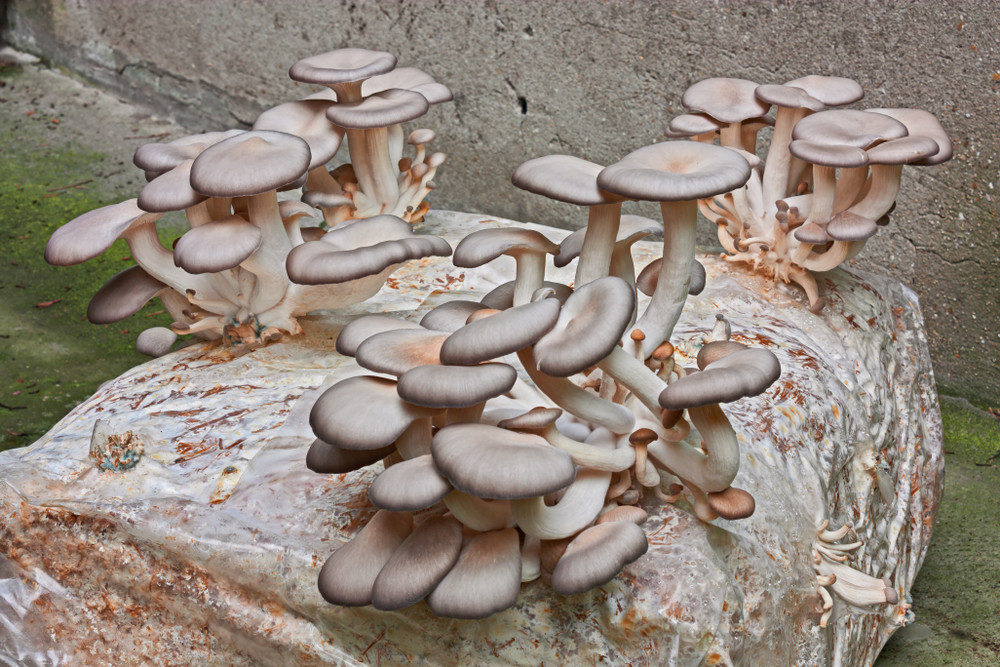
Oyster (Pleurotus ostreatus) –
With thin, delicate caps, oyster mushrooms get their name because they look a little like molluscs. Subtle and sweet with a velvety texture, oysters are best grown in basswood, willows, elm, balsam poplar, cottonwood, and aspen. Easy to grow and quick to fruit, oyster should be kept at 50 to 70F.
Lion’s Mane (Hericium erinaceus) –
In lieu of caps, lion’s mane mushrooms have clusters of spine-like “combs” that grow a few millimeters in length. With a taste that hints of seafood, recent studies suggest it may boost memory and mood. They grow well in sugar maple, oak, aspen, and walnut and prefer temperatures between 60 and 75F.
Reishi (Ganoderma lucidum) –
Used in Chinese medicine for more than 2,000 years, reishi mushrooms are said to be an elixir for vitality. Though it is a bit bitter in taste, it can be steeped in hot water to make reishi tea. These grow well in oak and sugar maple when kept at 70 to 80F.
Maitake (Grifola frondosa) –
Also known as hen-of-the-wood due to its ruffled feathers look, maitake are nutty and crisp. It will thrive in any species of oak at 55 to 70F. Patience with maitake is key since they can take two to three years to begin fruiting.
Wood logs should be freshly cut from healthy trees during the dormant season, the period between late autumn to early spring.
The cutting should be at least 4 inches in diameter and 2 to 4 feet in length.
Allow the wood logs to age for a minimum of two weeks but don’t allow the wood to dry out; it should still be moist by the time you inoculate it with mushroom spawn.
The decaying log will feed wood mushrooms for about four to six years and need only be inoculated once.
Start by drilling holes six inches apart down the length of the log, a ¼ inch deeper than the size of the dowel or peg spawn.
Make another row of holes, two to three inches apart from the first row and stagger them slightly in a zigzag pattern.
Keep drilling holes in this fashion until the entire log is complete. As soon as you’re finished drilling, hammer the spawn plugs into the holes until they are flush with the log’s surface.
To prevent contamination, all inoculation holes should be covered in a thin layer of very hot cheese wax. Melt the wax on the stove to a temperature of 300F and apply it to the holes with a foam brush.
Because these types of mushrooms typically prefer moderate temperatures and normal to high humidity, you can store your logs outdoors during the warmer months and indoors during winter.
While logs should be placed upright in a shaded or wooded area, they do benefit from day/night cycles so position them in a site that does get some indirect light.
Keep them moist by placing logs where rainfall will reach them, or when kept indoors, water them occasionally.
Compost, Wood Chips, and Other Organic Substrates
Ideal for indoor container cultivation or for an outdoor mushroom patch, these types of decomposers can be grown in trays, bags, jars, terrariums, boxes, or directly on the ground:
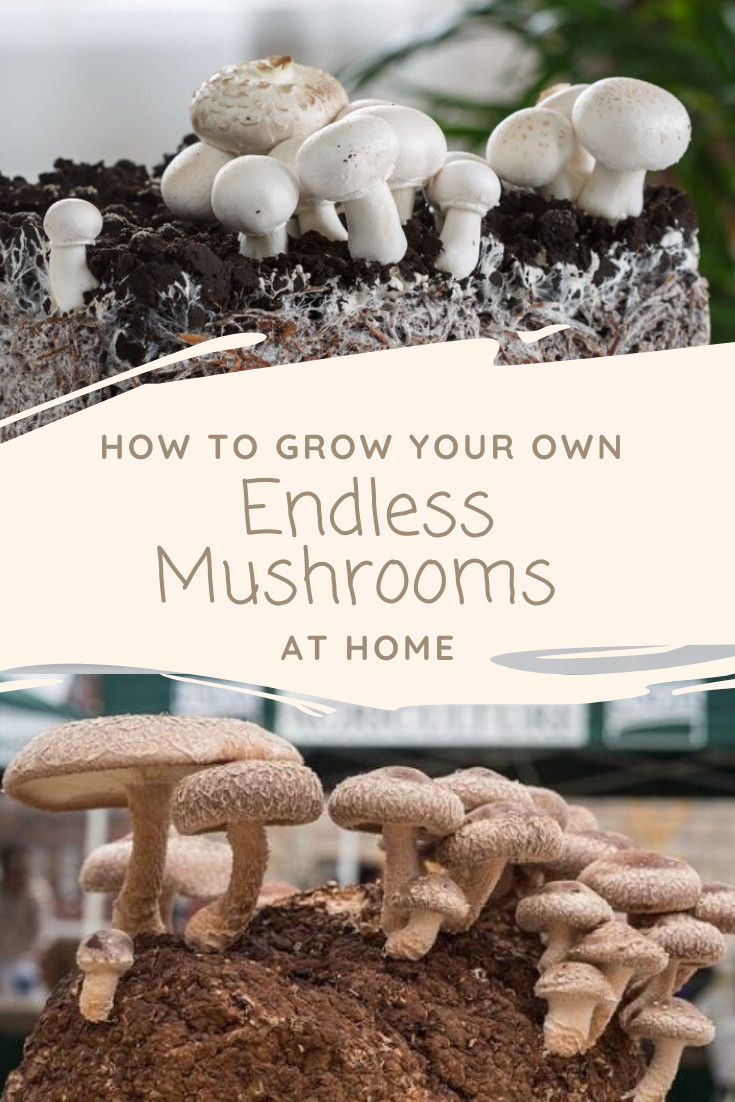
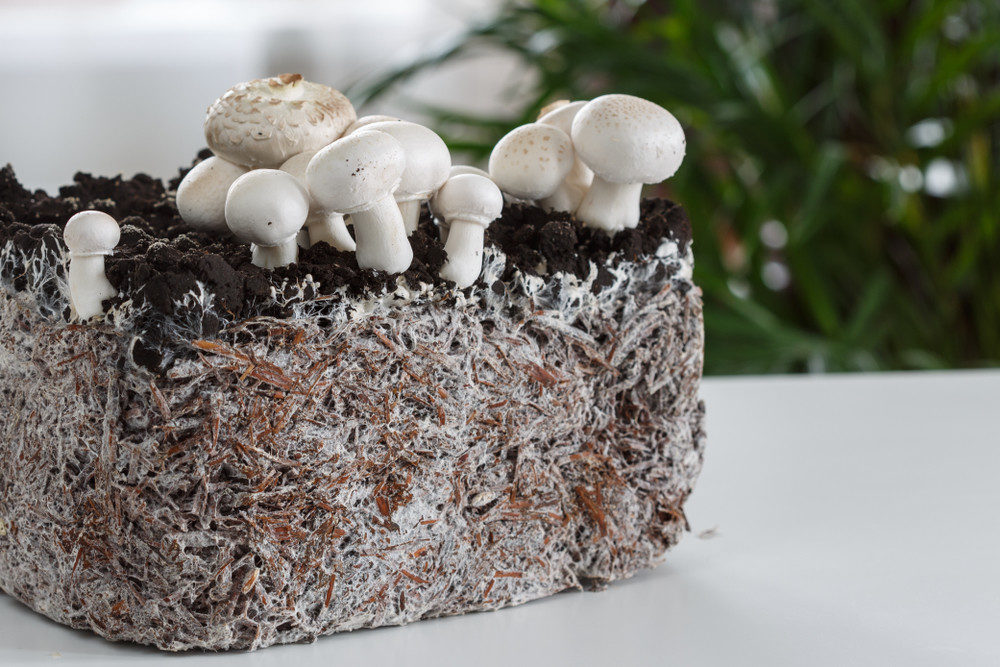
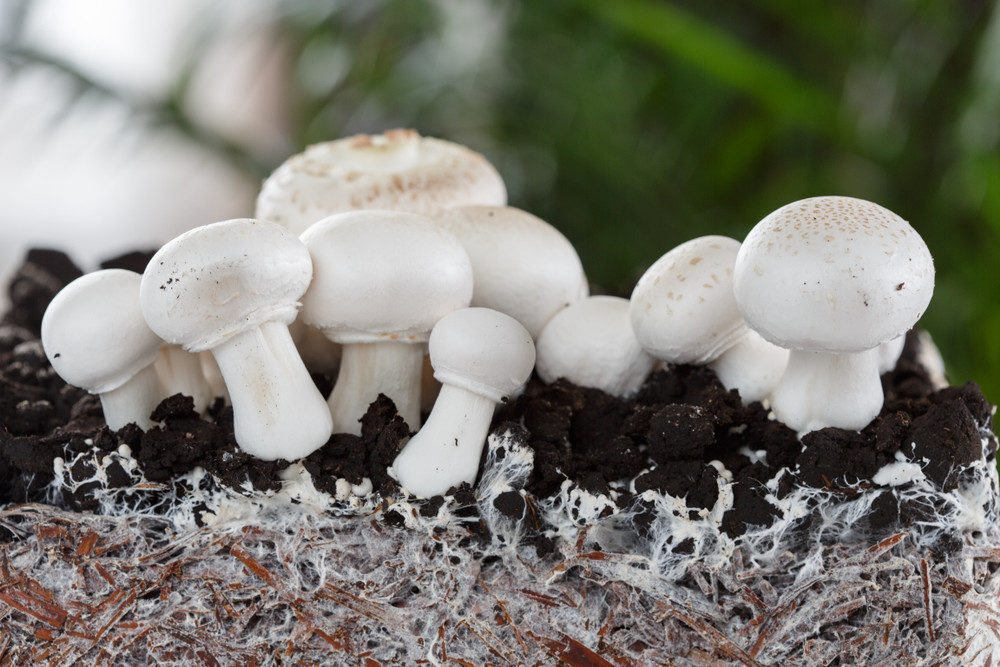
White Button (Agaricus bisporus) –
Easy to grow and very versatile, the white button mushroom is actually harvested before it is fully mature. When this mushroom is brown but still unripe, it goes by the names of cremini, Italian brown, and chestnut. When mature, they become portobello mushrooms. White buttons prefer compost as a growing medium in temperatures between 50? and 70?F.
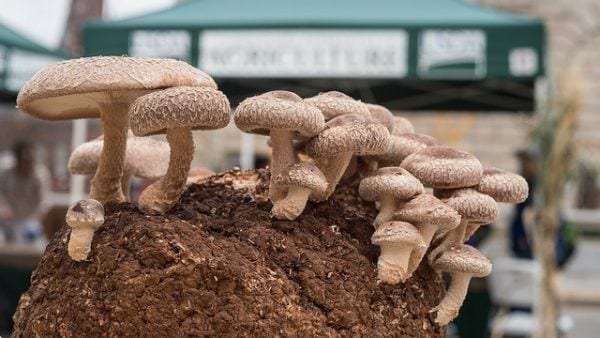
Wine Cap (Stropharia rugosoannulata) –
With purple-brown caps and firm white stems, these “garden giants” are similar in taste and texture to portobellos and grow well on straw or wood chips in temperatures between 60? to 80?F.
Almond (Agaricus subrufescens) –
Smelling and tasting of almonds, this variety is slightly sweet. Almond mushrooms can be grown on finished compost and thrive in temperatures between 60? and 75?F.
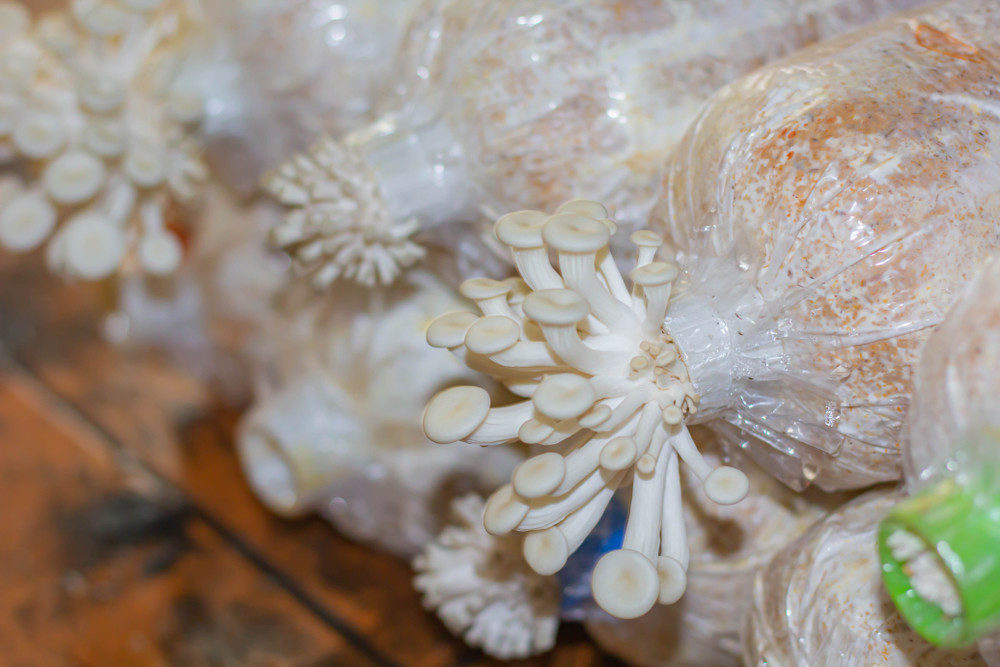
Enoki (Flammulina velutipes) –
Growing in clumps of long, white stems topped with tiny delicate pinheads, enoki mushrooms are mild and fruity in flavor. They can be cultivated on hardwood sawdust and are best kept at 45? to 75?F.
Shaggy Mane (Coprinus comatus) –
Commonly seen popping up on lawns, shaggy mane has elongated bell-shaped caps with white and grey scales. Once picked, it will dissolve a few hours later and are best eaten before they reach maturity. Compost is a good growing medium for this variety, kept at 60? to 70?F.
Before inoculating the substrate with mushroom spawn, it must be pasteurized or sterilized first.
This step – which involves heating the medium to 160? to 180?F – is crucial since it will reduce the amount of microorganisms that would normally compete with the mycelium, allowing the mushrooms to grow faster.
Do not heat beyond 180?F, as this will certainly kill off beneficial organisms.
Here are some general tips for pasteurizing commonly used mushroom substrates. This list is not definitive, as you can grow mushrooms in other waste materials like cardboard, junk mail, and spent coffee grounds.
Straw –
You can purchase pasteurized straw or make your own. Using a lawnmower or wood chipper, cut woody straw (rye, wheat, or cottonseed) into 1 to 3 inch lengths. In lieu of equipment like an autoclave or pressure cooker, you can heat up the straw in your oven.
Place the straw in an oven bag and add water so that the straw is damp. Heat the oven to 300?F, place the straw bag inside, and use a meat thermometer check the temperature regularly for the first hour. Once the straw is heated to 170? to 180?F, turn the oven down to 180?F and allow it to continue cooking for a total of 3 hours. When it’s finished, let it completely cool for 6 to 10 hours.
Wood Chips / Sawdust –
Using wood chips or sawdust from hardwood trees, you can sterilize these using the above oven method.
Compost –
If you don’t have any finished composted lying around, you can make your own in about five weeks. Blend together a mixture of straw and nitrogen-rich manure in equal parts.
Soak the straw in water before mixing in the manure, tossing it together with a pitchfork.
Allow the compost to rest but be sure to keep it moist. Use a thermometer to check the temperature of the pile; every time it reaches 160? to 170? F, turn the pile.
Repeat this step three more times, until you can no longer smell ammonia, the straw pieces are about four inches in length, and the pile has a fluffy texture.
Once the growing medium is pasteurized and cooled, you can begin sowing the mushroom spawn by sprinkling it over the substrate.
Each species of mushroom will have their own light, temperature, and humidity requirements but generally mushrooms like high humidity, good air circulation, low light, and room temperatures.
Keep the substrate moist by misting it with water twice per day and, if using an open container, trap moisture within by covering it with wet newspaper.
Once you see the mycelium growing, you can add a one inch layer of casting – moistened loamy soil or peat moss – which will boost growth. Casting needs to be sterilized too; you can use the oven or microwave it on high for two minutes.
Harvest & Forced Fruiting
You will know you have been successful in providing the mushrooms everything they need to grow when you see the growing medium colonized by the mycelium.
The vegetative stage begins when you see tiny pinheads emerge from the substrate. You can allow your mushrooms to develop naturally or help them along by tricking them into fruiting.
Mushrooms grown on wood logs can be forced into fruiting by shocking the logs in cold water for 24 hours.
Allow them to rest for at least eight weeks before shocking them again.
Another way to induce fruiting on non-wood mushroom varieties is to expose them to sunlight or artificial light for a minimum of 12 hours per day.
Generally, mushrooms are ready to harvest when the veil of mycelium breaks but before the gills release spores. To harvest, simply take hold of the cap and stem and gently twist.
Mushroom Propagation
To make your mushroom farm truly sustainable, you’ll want to preserve the mushroom spores for future use.
There are a few different techniques you can employ to harvest and prepare spores for inoculation on grains, sawdust, or vermiculite and create your very own supply of mushroom spawn.
Pin This To Save For Later