The old-timey technique of saving seeds from one growing season to the next is practical, self-sufficient, and pennywise.
Not only will you never need to purchase another packet of seeds again, harvesting seeds from a tasty fruit or vegetable that you know grows well in your yard means you can grow it year after year. If you’ve ever felt the pain and disappointment upon seeing that your favorite cultivars have been discontinued by the seed company, saving seeds can be priceless!
Moreover, saving seeds helps preserve genetic diversity. Our dependence on commercial varieties has caused thousands of heirlooms – or seeds handed down through generations of gardeners – to disappear. Sadly, over the past 80 years about 93% of produce varieties have gone extinct. But saving seeds from crops you grow or harvesting seeds from organic heirloom produce at the farmer’s market helps keep our food sources diverse. You can also stockpile your seeds to share and swap with like-minded gardeners or at a seed bank.
A Quick Primer on How Plants Produce Seeds:
Before we delve into how to save seeds, it’s important to understand some basic principles of plant sexual reproduction.
Open-pollination refers to plants that will “breed true”. These varieties self-pollenate or are cross-pollenated with other plants of the same type via the wind or insects. The seeds open-pollenated plants produce will be nearly identical to the parent plant. Heirloom varieties always come from open-pollenated plants.
By contrast, hybrid seeds are created by crossing two different but related plants to cultivate specific traits such as flavor, yield, hardiness, and disease resistance. Though this process can occur naturally, commercially available hybrid seeds (labelled as F1 on the packet) are bred through a carefully controlled process that can take many years and are often pollenated by hand. The seeds produced by hybrid plants are not genetically stable, however. If you plant the seeds from a hybrid plant, you will get an unpredictable combination of characteristics, both good and bad, from the original parent plants.
Selecting Plants:
For the beginner seed saver, open-pollenated annual plants are a good place to start. Seeds from tomatoes, peas, beans, peppers, and lettuce are easy to collect, prep, and store.
To keep plant strains pure and true-to-type, only plant one variety per species. For example, planting Roma tomatoes alongside cherry tomatoes carries the risk of cross-pollination between cultivars; the seeds you save could very well grow into a strange new hybrid (often inferior to the originals) the following year. If your property is close to a neighbor with a vegetable garden, be sure to situation your plot as far away from theirs as possible to further reduce the chances of cross-pollination.
The seeds from biennial crops – carrots, celery, leeks, onions, Brussels sprouts, kale, turnip, and the like – can be saved as well but you’ll have to wait until the second growing season for them to produce seeds to collect.
Harvesting the Seed:
Always choose the healthiest, most productive plants to harvest seeds from. Knowing when to harvest seeds and how to prepare them for storage varies from plant to plant:
Tomatoes
Harvest seeds from tomatoes when the fruit is completely ripe. Slice the tomato in half and scoop out the seeds and surrounding pulp with a spoon and deposit them in a clean glass jar. Add some water and cover loosely with cheesecloth. Place in a warm spot and stir once or twice per day. The pulp will start to ferment (this is good!) and after about 5 days, viable seeds will sink to the bottom. Pour off the liquid and collect the seeds, rinsing them before spreading them out to dry.
Peppers
Sweet and hot peppers should be fully mature before harvesting the seed. In the case of sweet peppers, they should be red and not green. The process of collecting pepper seeds is super easy, just scrape the seeds from the cluster in the center of the cone. Rinse and pat dry.
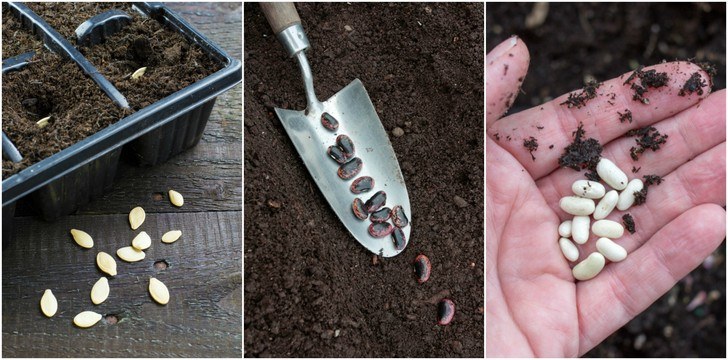
Peas & Beans
Harvest seeds (or pods, in this case) from peas and beans when they are brown – which is about four weeks after you would have normally harvested them for food. You’ll know they’re ready when you can hear the seeds rattling inside the pods. Dry pods for about two weeks before removing the shell and collecting the seed.
Lettuce
You can collect lettuce seeds once the plant has bolted (that is, flowered), and while you wait you can still harvest the outer lettuce leaves without harming the plant. Once it has flowers, pinch them off and carefully drop them into a paper bag. Pour the contents over a flat surface and break apart the flowers to release the seeds. Once you’ve separated the seeds from the flower, spread them out dry.
Cucumber
Because cucumbers are tasty when they are still immature, you should leave a few cukes on the plant to allow them to fully ripen before collecting seeds. They will turn a golden yellow color when ripe, about five weeks after you would normally harvest them for fruit. Just like tomatoes, cucumber seeds need to be fermented along with their pulp.
Melons
Spanning watermelon, honeydew, cantaloupe, and Armenian cucumbers, the process of collecting seeds for these varieties is one and the same. Once they have ripened and are ready to eat, simply set aside the seeds and rinse in clean water to remove pulp. Pat dry.
Squash & Pumpkin
Members of the Cucurbita family, squash and pumpkin should be fully mature before harvesting the seeds. The outer shell should be hard. Once you’ve cut the fruit from the plant, you can set it aside for another three weeks or so to allow the seeds inside to ripen further. When ready, slice the fruit open and scoop out the seeds. Place seeds in a strainer and rinse with warm water to remove surrounding pulp.
Seed Drying & Storage:
Because seeds tend to stick to paper towels, only use ceramic or glass dishes to dry seeds. Set them in a cool, shaded spot with low humidity for quicker drying.
Seeds are completely dried when they are hard. Test by squeezing one seed; if it still feels soft and flexible, it needs more time to dry. You can also press it with pliers or hit it with a hammer – if the seed shatters, it’s dry.
Stow seeds in a cool, dark, dry place. Seeds stored in paper envelops will keep for 2 to 4 years but you can extend their shelf life for a decade or more by keeping them in a tightly sealed glass container and storing them in the fridge or freezer. Be sure to include a label that specifies the crop, variety name, and date of harvest.