Microgreens that were originally used by Californian chefs to add visual appeal to gourmet dishes have now emerged from the fine dining space into the mainstream. The credit goes to their surprisingly pungent flavors rather than their exotic appearance. Their high nutritive value is another good reason for their quick rise in popularity. These tiny greens pack flavor and nutrition that rival their mature counterparts.
Microgreens are neither sprouts, nor baby greens, but fall somewhere in between. To be more specific, they are sprouts that are allowed to take root and develop a set or two of true leaves. They are more flavorful than sprouts and nutritionally superior to both baby greens and regular greens. But the best thing about them is that they can be easily grown by the home gardener and incorporated into our regular diet.
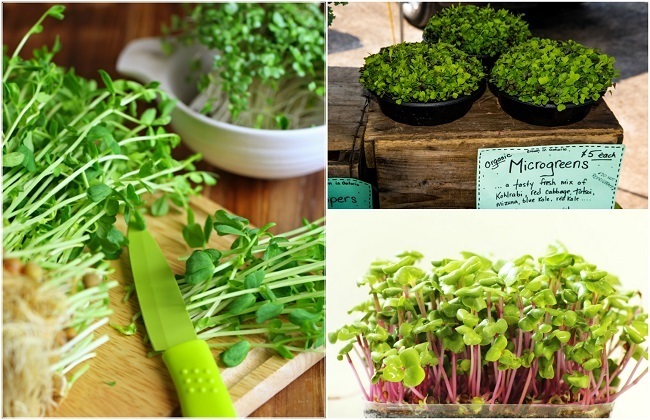
All salad greens can be grown as microgreens, but a number of other veggies such as carrots, broccoli and sunflowers are also included in this category. The main requirement is a good supply of organically grown, untreated seeds. If you grow many different types in the same tray, you should ensure that they will be ready to harvest at the same time.
10 Microgreens You Can Grow & Enjoy
Beet (Beta vulgaris) – You can get beets that give microgreens with red and purple stems. Getting ready in about 18 days, they are such a delight to grow and to use in any dish to add visual appeal. Bull’s Blood and Detroit Dark Red are popular microgreens varieties.
Chinese celery (Apium graveolens) – It comes in dark green and light green colors, but both have the same taste and flavor. It can take over a month for them to reach the microgreen stage. Soak the seeds for 3 days prior to sowing to ensure faster germination.
Coriander/Chinese Parsley ( Coriandrum sativum) – Coriander microgreens come with a pair of elongated cotyledon leaves and one or two fan-shaped leaves with fringes. Despite their small size, they give the typical strong smell and taste of coriander leaves that are loved by some and hated by others. They will be ready in 18-20 days after sowing.
Garden cress (Lepidium sativum) – Cress sprouts are a staple in the egg and mayonnaise sandwiches of the English. The microgreens with a peppery taste can be used in soups and salads as well. They are harvested within two weeks of sowing. American cress/Upland cress (Barbarea verna) also has a similar taste and flavor.
Onion/chives/ (Allium sp.) – These are monocots and have a grass-like appearance, with the first leaf of each sprout tipped with the empty seed coat. They take a month to reach the microgreen stage. If they are harvested by snipping off just the top 1-2 inches, you can continue to get a few more harvests. Wheatgrass is another example of monocot microgreens that can give more than one harvest.
Mustards (Brassica juncea) – You have several mustards to choose from besides the regular green ones. The Osaka Purple and Red Giant give greens with purplish stems and reddish leaves respectively. Irrespective of the color, they pack as much pungency as you would expect from mustards. Growing 1 ½ to 2 inches, they become ready for harvest in 14-16 days when the first true leaves appear in most of the plants.
Greens (Brassica rapa) belonging to this group comes in different forms and names such as Mibuna, Mizuna, and Tatsoi. These mild tasting greens are popular constituents in many microgreen mixes. They are ready when they develop 2-3 true leaves, usually within two weeks.
Kohlrabi (Brassica oleracea) Another member of the brassica group ready to be harvested in 14 days. The leaves are dark green with light purple stems.
Orach ( Atriplex hortensis) The bright red color of the Fire Red variety of Orach is extremely striking, but it tastes rather mild, like its relative spinach.
Radish (Raphanus sativus) One of the quickest growing among microgreens, they can be harvested within 12 days of sowing the seeds. Sango, Red Arrow, Japanese Daikon, and Triton are popular for their contrasting leaf and stem colors.
Personal taste is the major deciding factor in choosing microgreens since both cool season plants and hot season plants can be successfully grown indoors if you provide the right conditions. Those who prefer some punch in every dish can grow arugula, cress, mustard and radishes. Their microgreens are a zestier version of their regular greens.
On the other hand, carrot, cabbage, broccoli, chard and spinach give milder microgreens and a mixture of them can make a veritable salad on their own. This is your chance to grow some plants that you wouldn’t normally have in your garden. Komatsuna, mizuna, red amaranth and Tatsoi are worth a try if you can source their seeds.
How To Grow Microgreens In Trays
Shallow containers are good enough for microgreens. Since you are not expecting the seedlings to be in the tray for more than 2-3 weeks, you need just an inch or two of growing medium. They develop a set of true leaves within that short period, and they are ready for the table. The roots may spread and form a mat underneath the soil, but it doesn’t matter since we are going to snip off only the part growing above the soil surface.
Although microgreens can be grown in any container, seed starter trays with an open structure at the bottom are the best. They allow good air circulation and drainage which help keep away fungi and rot, the bane of sprouts. Drainage is particularly important when the seedlings are crowded together. If the drainage holes are too big, you can place a piece of newspaper at the bottom to prevent soil run off.
You need a good growing medium for the seedlings since they have only a brief window to sprout and flourish before they are harvested. Unlike sprouts, microgreens are grown in sunlight. However, they can be grown indoors as long as the seedlings get enough light to develop healthy leaves. That means round the year supply of nutritious, homegrown food, irrespective of the season.
Fill the trays 2” with the prepared potting mix after moistening it slightly with a spritz bottle. Scatter the seeds all over the soil, but not as closely as you would for growing sprouts. You should not cover the seeds with soil as it would cause the seeds to sprout at different times and the seedlings to come up haphazardly. Harvesting is easier when all of them grow uniformly upright. Don’t tamp down the soil either. A loose soil structure is the best; it facilitates good root run and faster growth of the seedlings.
After you have scattered the seeds, spray the soil surface very lightly. Keep the tray in a warm place and cover it with a black plastic sheet or damp towel. This will help maintain the dark, warm and humid conditions that promote seed germination.
You may start to see the sprouts from the third day onwards, germination time vary depending on the type of seed as well as external conditions. Remove the cover and move the tray to a sunny spot. In a few days, the tray will be green with all the cotyledon leaves opening up. The tray can go outside to semi shade or remain inside in a well lit window or under grow lights. If the seedlings don’t get sufficient light, they will grow weak and leggy.
Water the plants by spraying or by bottom watering. The latter method is preferred by many growers because it doesn’t disturb the young plants. Take water in a larger tray and place the tray with the microgreens into it. The water should come up to the root zone. You can lift off the tray after half a minute and let the excess water drain away. Some people keep a drip tray under every seedling tray and add water to the bottom tray whenever required.
How To Harvest Microgreens
Microgreens are generally harvested when most of the plants in a tray are 1-2 inches high. They should have at least two true leaves in addition to the cotyledon leaves. You can even pinch off a few to check the flavor. Spray the plants thoroughly two hours before you intend to harvest them. Shake off excess water and allow them to air dry. This will keep them at their freshest.
Hold the seedlings in a small bunch and snip them off with sharp scissors. You don’t have to harvest all the greens in a tray on the same day, but it is advisable to cut off all plants in a small area before moving to another area. These seedlings are actually managing to stay upright by supporting each other. Trying to pick selectively from the crowded patch can bruise the tender seedlings and invite diseases. You can do that out in your garden patch though. When you thin out seedlings to make room for others, you can choose the ones that are in the microgreens stage and add them to your salads.
Wash the microgreens gently in a dish full of cold water, drain, and dry them on a towel. You can keep them fresh until use by spreading them on a wet kitchen towel and covering with another damp towel.
How To Use & Store Microgreens
Microgreens are so intensely flavorful that a handful will go a long way. Don’t ever underestimate the effect these dainty little things can have in a salad or on a piece of toast or fried fish. A few mustard microgreens tucked into a sandwich will give the impression of mustard sauce. Microgreens of basil on a pizza may be just as effective as, or even better than, the chopped leaves. Add them to soups and stir-fries just before serving.
Ideally, microgreens should be used as soon as they are harvested. They can be stored in the refrigerator for a few days, but may lose their flavor and nutritive value on keeping any longer. To retain their crispness, put the microgreens in a glass bowl and cover it with cling wrap or store them in Ziploc covers.
Growing microgreens at home is a great way to get more nutrition out of less work, and all of it without the use of any harmful pesticides. It can even get the kids hooked on to veggies. They can easily grow them in any container and need not wait for months to see the result. The different colors and flavors are so appealing that it would be a delight to try different types.