Pickles are a favorite with many people around the world, and just like anything else when it comes to food, nothing beats a homemade recipe. While the store-bought type of pickles are still a good choice for your home pantry and refrigerator, being able to pickle your own cucumbers is an extremely simple and delicious process. But you don’t have to just limit your home pickling to cucumbers. In fact, just about any vegetable can be quick pickled for a tasty treat – the sky’s the limit with so many different options.
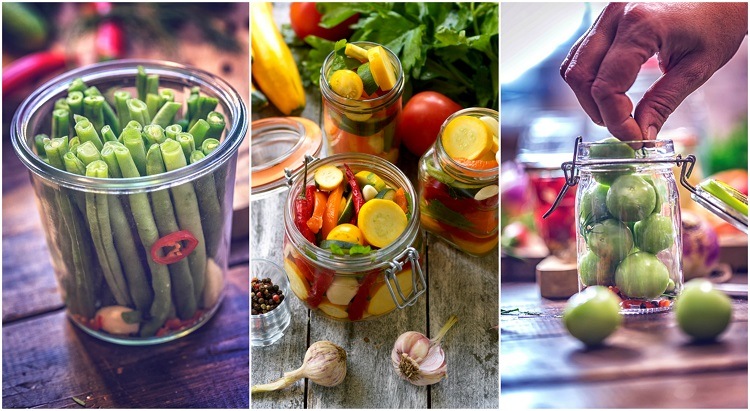
Professional and amatuer chefs alike can make some quality pickled vegetables. Almost any kind of veggie can be improved with the pickling process, ranging from okra, tomatillos, beets, to carrots. Plus they make for a great addition to any salad or just to snack on by themselves. No canning is required during the process either, which makes it even less of a hassle.
What is a Quick Pickle?
Quick pickles are produce that are soaked in brine in your refrigerator, as opposed to the outdoor fermented process. Even though the fermented kind is developed a little differently and has a deeper flavor, quick pickled vegetables are enjoyable too. Vinegar, salt, sugar, water and spices are often used to make up the brine, and within just a few days they’ll be ready to be served with a meal or eaten with a snack.
Fresh Is Best
For best pickling results, always use your freshest vegetables on hand. If they are starting to get a bit soft or bruised, save those for another dish such as your next soup or stew. You can use any vegetable that you want for a quick pickling, and they can all be carved into whatever shapes are desirable as well. For example, carrots are be sliced into thin sticks and cucumbers can be formed into medallions to fit into a glass jar along with the brine.
Brine Basics
A basic brine recipe includes equal parts of water and vinegar, and it can be adjusted to your preference of strong flavor. Any kind of vinegar is able to be used, including apple cider vinegar, white wine vinegar, rice vinegar, or any basic kind of vinegar. Try not to use either malt vinegar or balsamic vinegar though, as they are too concentrated and aged for good pickling results.
Quick Pickling Steps
Step 1: Prepare Your Vegetables
The first step to any cooking process is to wash and clean your vegetables, so that you can remove any grime or excess dirt on the outer layer of their skin. When it comes to pickling cucumbers, tomatillos, turnips, tomatoes, and other similar vegetables dice them up into whatever size and shape that you like. There are other vegetables that turn out much better if they are blanched, meaning briefly boiled so that they are just slightly soft. Vegetables that are recommended to be blanched include carrots, okra, green beans, peppers, ginger, beets, brussel sprouts, and others of that sort. If you decide that you want to go the blanching route, simply boil 16 cups of water for every pound of vegetables that you have and cook them at a boil for just two minutes. Be sure to cool them down in a bowl of ice water before putting them in your pickling jars.
Step 2: Prepare the Jars
For starters, get two wide mouth glass pint jars with lids and soak them in warm soapy water. Rinse them well and either dry them completely or set them aside to dry naturally. If you plan on pickling a lot of vegetables, more than two jars may be needed. Using clear glass jars is another useful tip, so that you can watch the status of your vegetables as they begin to pickle over the time in your refrigerator.
Step 3: Divide the Vegetables
After you’ve got your vegetables chopped, blanched, and sliced how you want, divide them up among how many jars you have set out and put them aside. In the end, you will want to make sure not to overfill the jars or pack the vegetables in there too tight, so that the liquid has access to all of them. Getting a lot of veggies in one jar is perfectly fine, but after you are all done you can test the liquid’s ability to move around by shaking the jar. If all of the vegetable pieces move, you are good to go.
Step 4: Add Flavorings and Spices
This stage allows you to get your creative juices flowing, literally! There is no right or wrong combination of flavorings and spices, so think about which herbs appeal the most to your taste palate. Be bold and mix and match a lot of different spices to see what works best for you. Here are some general measurements to go by, that would be a decent amount per glass pint jar.
- 1/2 tsp cumin seed
- 1/2 tsp turmeric
- 1/2 tsp dill seed
- 1/2 tsp mustard seed
- 1/2 tsp pickling spice
- 1 jalapeno pepper
- 1 sprig of fresh oregano
- 2-4 sprigs of fresh dill
These are just examples, but they are common ingredients that people like to add into their pickling jars. Other options might include black pepper, garlic salt, onion powder, or even coriander. Put your spice mixture into each jar before adding the vegetables.
Here are some additional flavorings that are suggested for a quick pickling:
- Fresh herbs: rosemary, thyme, savory
- Dried herbs: rosemary, thyme, marjoram, oregano
- Whole spices: mustard seed, peppercorns, red pepper flakes, bay leaves
- Ground spices: smoked paprika, cajun seasoning, or cayenne pepper
Step 5: Make the Brine
Dry additions from your spice cabinet are great, but so are wet ingredients, such as minced garlic, diced jalapenos, or a teaspoon of horseradish. You can also tailor your brine to be sweet or tangy depending on what you mix together in your jars. Below are two examples of brine recipes, one that is appropriate for a sour flavor and another that is sweeter.
Sour Brine Recipe:
- 3 cups distilled apple cider vinegar (or white vinegar)
- 3 cups water
- 2 tbsp plus 2 tsp of sea salt
- 2 tbsp sugar
Place all of the ingredients into a saucepan and bring to a boil until nothing is left undissolved. Let it boil for two minutes and then remove the pan from the heat.
Sweet Brine Recipe:
- 3 cups of distilled white vinegar or apple cider vinegar
- 3 cups water
- 1 1/2 cups plus 1 tbsp of sugar
- 1 tsp sea salt
Place all of these ingredients into a saucepan and then bring the mixture to a boil. As it heats up, be sure to keep stirring until all of the sugar and salt are dissolved. Bring to a boil for two minutes and then remove from heat.
After your brine is made, pour it into the jars and leave be sure to leave it within ½ inch from the top. It might be the case that you have more brine than you need, so be aware that not every single drop needs to be used.
Step 6: Remove Air Bubbles
After pouring your brine into the jars with the vegetables and flavorings, you may notice that some bubbles are forming on top. It’s best to remove them as soon as possible, which can easily be done by tapping the jars against the counter a few times to get rid of them all. It might help to pour a little less brine than you initially need, so that once you remove all of the air bubbles you can top it off with a little more liquid to smooth out the surface.
Step 7: Seal the Jars
After all your goods are tucked away in jars, seal them up and make sure that the vegetables are fully covered with the brine. Place your jars in the refrigerator for at least 24 hours before eating anything, however, if you quick pickled okra or turnips they do better staying in the fridge for at least a week before serving. All the veggies are good for up to two months if they are kept in a cool place unless you decide to can them, which is not necessary for this process but can be done.
Tips for Giving your Homemade Pickled Vegetables Great Texture
Now that the basic recipe and method has been established, there are still a few extra things that you can do to ensure that your homemade pickles (and other vegetables) turn out to be the very best version of themselves. Sometimes the difference between a good pickle and a great pickle can be a matter of just a little bit extra effort. Here are some tips to make your quick pickled items fantastic:
Pay Attention to the Size of your Chop
As you chop your vegetables, make sure you have an idea of what size and shape you want them to end up. That’s because the more you work with them and chop them, the less crisp they become. You may want your pickles to be softer to compliment your burger or as a side salad, but in case you want that nice sharp crunch, be aware that they have to be a bit larger. This is why whole pickles are a lot firmer than butter pickles, as they were given a chance to stiffen up.
Trim the Blossom End from Your Cucumbers
Even though this tip is really only meant for cucumbers, it will make all the difference in the world for your homemade pickles from these juicy veggies. One of the best ways to immediately improve the texture of your cucumbers is to cut off their blossom ends. The reason for this is because this part of the cuke is where an enzyme is stored that can cause the vegetables to go limp. So, by cutting the end off right away you will soon notice how much better the texture of pickles will be.
Add in Some Onions for Extra Flavor
One vegetable that doesn’t take up a lot of room, but adds a lot of flavor to the mix is an onion. Red, white, sweet, or yellow kinds all pickle really well and also enhances the other veggies in the jar with it. These can be an excellent addition to your next salad, coleslaw or summer barbecue, as the pickled onions would go delightfully on top of any burger or hot dog.
Throw in a Few Hard Boiled Eggs
Pickled veggies are great for snacking on, and adding some hard boiled eggs to your quick pickled jar of goods might be a delicious way to enhance your serving tray. Eggs don’t need any more time than regular cut vegetables to be pickled, and they are an equally healthy treat that are sure to impress anyone who stops by your home for a snack or dinner.
Before Making your Brine, Measure What You Need
There is nothing worse than making your brine and boiling it only to find that you haven’t made nearly enough. To avoid short-changing yourself, measure how much liquid you need with water before you get started so that you know what measurements to have. Since liquids evaporate a little after being put on heat feel free to make much more brine than you thought you would need in the first place. It’s better to have too much than too little.
Give Your Brine Some Time
Just because the recipe calls for your veggies to sit for 24 hours, doesn’t mean that more time would hurt them. In fact, the longer that you allow your quick pickled vegetables to sit, the better the flavor will be in the end. It might be a good idea to hide them from yourself in the back of the refrigerator, or put them in your second fridge for at least a week so that they become nice and marinated.