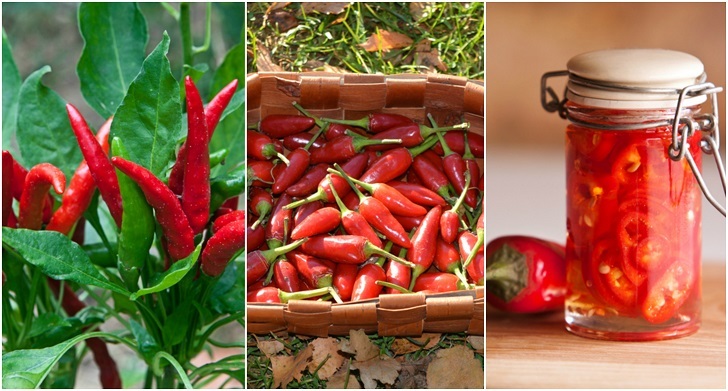
If you enjoy growing your own food, you really need to add chilis to the mix. Not only do they add zest to any meal, from breakfast to barbecues and beyond, they’re incredibly nutritious and offer properties that can boost your health from the inside out and the outside in. Plus, there are a number of surprising, strange ways they can be used as well, making chili peppers a must to grow in just about anyone’s garden.
Famous for their hot flavor, chilis are primarily used in cooking, as a spice added to a variety of dishes and sauces. Some of the most popular varieties include habanero, jalapeno, cayenne, and serrano. They were first cultivated by farmers in Central and South America thousands of years ago, but today, they can be found growing all over the world. One of the reasons these peppers are so healthy is because they contain a bioactive plant compound known as capsaicin. In fact, that’s what gives chilis their hot and spicy kick. The substance is concentrated in the seeds and white inner membrane – the more there is, the spicier the pepper will be.
Capsaicin is especially well-known for its ability to relieve pain, though it’s also shown promise for boosting weight loss efforts as it can help reduce calorie intake and shrink fat tissue. Some of its other benefits include:
1. Fighting inflammation. Thanks to its antioxidant and anti-inflammatory properties capsaicin can fight inflammation, the root cause of many illnesses and disease.
2. Strengthening the immune system. As chili peppers are rich in beta-carotene, they’re known to help protect the body from disease. Their high level of vitamin C further helps the body to produce white blood cells that fight germs.
3. Lowering the risk of heart disease and heart-related conditions. Capsaicin can help lower overall cholesterol levels, triglycerides, and platelet aggregation. Cultures that frequently use peppers in cooking have been found to have significantly lower stroke and heart attack rates.
4. Aiding blood sugar management. Consuming chili peppers regularly has been shown in studies to lower high insulin levels in the blood.
5. Relieving congestion and fighting sinus infections. Capsaicin also has the ability to relieve nasal congestion by helping to clear out mucus. Thanks to its potent antibacterial properties, it can even help battle chronic sinus infections.
Grow Your Own Chili Peppers To Enjoy Their Amazing Medicinal Benefits & More:
The best way to take advantage of all the benefits chili peppers have to offer, is to grow your own right at home. They’re surprisingly easy to grow, but after doing a little research online, you’re likely a bit overwhelmed by all of the information and not sure where to begin.
These basics to growing will help ensure you reap an abundant, healthy chili pepper crop.
Choose your chilis.
Chilies are such fabulous plants to grow because they come in such a wide range of colors, tastes, sizes and spice levels. They can be either an annual, which means that need to be replanted every year, or a perennial, which means they grow back on their own.
There are three general types of chili peppers to consider: hot, sweet and ornamental. All have some level of spice, but sweet chilies, as the name belies are the mildest. Hot chilis are known for the intense spicy flavor, and, ornamentals come in wonderful shapes and hues, though they can also be quite hot. Colors range from buttery yellow and peachy orange to green, plum, fire-engine red and even pitch black, but the color doesn’t necessarily have a direct correlation to the pepper’s level of spice or flavor.
You’ll also need to do some research online, or visit your local nursery, to find out which varieties do well in your particular region.
Starting with seeds.
Once you have your seeds, prepare them by softening them. To do so, place a damp, folded paper towel into a plastic bag, and then place the seeds inside the paper towel. Leave the bag in a warm, dry place, like a kitchen cabinet and allow them to remain for several days. As soon as they start to sprout, they’re ready to plant. You can purchase seed trays or use individual planting pots. Fill each container with soil, and then place a single seed in each one, about a half-inch below the soil’s surface. Thoroughly water your seeds, and then give them enough water every day so that the soil stays moist at all times – usually about a teaspoon of water after the initial thorough watering.
Your growing seeds should be placed in an area that gets lots of sunlight, such as a south-facing window, along with plenty of heat, like near a radiator. You don’t want them to get too cold or too hot, as either extreme will stunt their growth.
When to plant outside.
Watch for your seeds to start sprouting, which can be anywhere from several days to a few weeks. They’ll first sprout a pair of leaves, which are referred to as “seed leaves,” and then the “true leaves,” will sprout, which is the sign you need to start planting outside. You can plant them as soon as their true leaves have come in, or wait a little longer for temperatures outside to rise.
Determine your planting site.
The right site can make a big difference as to how well your peppers will do. Chili’s love the heat, so choosing a sunny, well-drained site where peppers haven’t grown recently is a must. It’s best to pick a plot in your garden that gets full sun or mostly sun for the majority of the day. If you live in an area that’s very sunny and hot, like the desert, you may need a location that has a little shade so the plants won’t get sunburned. In wet, rainy areas, look for a spot that gets full sun and has good drainage. An excessive amount of water will drown out your peppers, and cause them to grow less fruit. If your soil has poor or average drainage, you can enhance it by mixing in a little sand. If potassium is not already present in sufficient amounts, then you’ll notice a significant growth boost by increasing the amount of potassium in the soil.
You want the soil to be deep and rich – if it’s not, it can be amending by adding an inch of compost. Just be careful when it comes to nitrogen as too much can cause the plants to grow too quickly, and makes them less productive and more susceptible to disease. Generally, the correct balance of light, water are really all that the plant needs.
Hardening your seedlings.
The final step before planting your pepper seedlings outside is to harden them off by gradually exposing them to outdoor conditions, which helps them adjust so that they’ll undergo less stress when transplanted. The less stressed they are, the more they’ll produce, and the bigger the peppers will be. Daytime temperatures should be reaching the mid-60s and the last frost of spring should have passed when you get ready to harden them, usually some time in March or April, depending on your particular climate.
To harden them, place your plants in a sheltered location outdoors, such as next to your house in the backyard, for several hours every day for 3 to 4 days. Then, over the next week, gradually extend the time they spend outdoors. Just before you transplant them, you can get your pepper bed warm by covering it with a dark landscape fabric to further help prevent added stress.
Planting.
It’s best to set your peppers out on a cloudy day to reduce stress. They should be planted individually to avoid crowding, spaced 12 to 20 inches apart, depending on variety – check with your local nursery or research online to determine your seedlings particular needs. Dig small holes, that are slightly deeper than they were in their containers. If you have taller varieties, stake or cage them so that they stems won’t break in a strong wind, or because of heavy fruit. Once you’ve placed the seeds in the ground, replace the soil over the top of each one, so that about a quarter-inch of soil is on top of them. Don’t tamp or press down on the soil too much afterward, as they’ll do better in loose, well-draining soil.
Caring for your plants.
Throughout the growing season, it’s important to ensure your plants get at least an inch of water every week. Chili peppers will thrive when their soil is moist, but not soaking wet. During times of drought and extreme heat, check them often – sometimes they can take in a gallon of water a day. In very hot, dry regions, adding a thick layer of organic mulch can help the soil to retain moisture and to help moderate the temperature of the soil.
Pinch off the first blooms for larger fruit later.
As hard as it might be to do, you should really pinch off any early blossoms that appear on the plants – it doesn’t harm them, but actually helps them so that they direct more energy into growing. The means an abundance of large peppers later, instead of a few small ones early on.
Harvesting.
Time to harvest varies depending on the particular species of peppers, but you can generally tell when they’re ready by their size. The flavor will be sweeter if you wait for them to turn their mature color, which again, depends on the species. When they’re ready, cut them off using hand pruners – don’t pull by hand as it could damage your plants.
Weird Ways To Use Your Chili Peppers:
Now that you’ve got your bucket full of chili peppers, you probably already know about the many ways to use them in cooking, but what about some of the unique ways to use them?
1. Make a pain relieving paste.
We told you about the powerful pain-relieving effects the capsaicin in chili peppers offers. You can take advantage of its abilities by turning it into a pain-relieving cream that’s especially known for helping joint and back pain. It works because capsaicin depletes a neurotransmitter, substance P, which is responsible for sending pain signals to the brain. When substance P is blocked, the brain doesn’t know something is hurting, so you don’t feel the pain.
To make a capsaicin paste, all you need is a tablespoon of cayenne pepper (or use cayenne powder, making your own with the recipe here) and 5 tablespoons coconut oil. Mix the oil and cayenne into a paste, and simply massage the paste onto areas you’re experiencing pain. Just be sure to wash your hands immediately afterward, to avoid getting hot pepper into your nose or eyes.
2. Plump up your lips.
Some people shell out exorbitant amounts of money to get plumper lips, but if you have your own peppers, you don’t have to. Peppers act as an irritant to mucous membranes and thin tissues, which help to make the lips swell slightly. You can use chili peppers to make a lip plumper. You’ll also need some coconut oil, gloves and something that you can use to mash up the peppers into a pulp, like a mortar and pestle.
Start by deseeding a fifth of the chili pepper. Now pound it into a “mush.” Mix a little coconut oil into the pepper, enough so that it looks like a salve. Remember not to touch your face before you’ve washed your hands after handling peppers. Now, use a cotton swab to apply to your lips.
3. Cool off.
While eating chili peppers probably doesn’t sound like a good way to cool down on a hot summer day, it actually is. No wonder so many of the world’s spiciest foods come from places that are notorious for their hot weather, right? Spicy food actually encourages sweating, without raising body temperature, which is the way the body helps itself cool down.
4. Make a detox drink.
You can use cayenne peppers to boost the health benefits of water, and detox your liver, colon, and kidneys. This beverage was actually popular as part of the Master Cleanse diet, and while we don’t recommend that, as it can harm your health and your metabolism, but including this drink as part of a healthy diet, can help improve health and support weight loss. To prepare it, simply combine the juice of 1 large organic lemon and 2 small limes, a teaspoon of raw honey, one-tenth of a teaspoon cayenne pepper and 8 ounces of filtered water.
5. Rub chilies onto your face for more glowing skin.
Rubbing a concoction of cayenne pepper and other ingredients onto your face is said to tighten, tone and brighten it as well as to stimulate blood flow. To create this face mask recommended by beauty blogger Rochelle Wickramasuriya, you’ll need 1-1/2 cups whole milk or coconut milk, a tablespoon of fresh-squeezed lemon juice, a pinch of cayenne pepper, a quarter teaspoon ground cinnamon and a half teaspoon raw honey. Add the lemon juice to milk in a pan over medium-high heat, just before it reaches the boiling point. Once it’s curdled, separate the milk fat until it becomes smooth. All the mixture to sit in the refrigerator to chill. Once cold, mix in cayenne pepper, cinnamon, and honey. Apply the mask over your face, being careful to avoid the eyes. Leave it on for 30 to 45 minutes, or until dry, and then rinse it off.