
Gardening is much easier with raised beds. They make many traditional gardening chores like deep tilling, weeding and amending the soil redundant. If you have poor soil, if it is too acidic or clayey, if the ground is rocky or uneven, raised beds can come to your rescue.
You can fill the raised beds with good quality compost and soil so the plants get to live in the best of soil conditions. Filled-in beds ensure good soil aeration and drainage. Plants can have excellent root run and they will escape competition from tree roots in the ground.
pH of the soil can be easily adjusted to suit the plants you’re growing. Adjacent beds can have ericaceous plants growing in one and have sweet soil in the next. Troublesome creepy crawlies are less likely to find their way into your raised beds. It is easier to fix protective hoops and supportive structures.
When you top dress the beds occasionally, the rains won’t carry it away. You can grow more food in less space because closer planting is possible. Also, crawling plants can hang over the sides of a bed, leaving the space inside for other crops.
Well, the benefits of raised bed gardening are numerous. But what is even more heartening is that it is quite easy to make raised beds. You can make simple structures using locally available materials. The whole family can pitch in and get it done in just an hour or two.
Here are some quick and easy DIY raised beds to get you started.
1. Raised bed with sandbag for sides
To start with the easiest, this raised bed requires just sandbags. Ready-to-use sandbags could be available in many disaster management centers. Sand is usually available from many nurseries and building supply companies in case you want to make your own, but it might be illegal to collect sand from beaches. Garden soil does not work as an alternative.
To make a 4ft x 8ft raised bed, you may need 20 sandbags measuring 1ft x 3ft. A width of 4 ft is ideal for beds since you will be able to plant and harvest crops without stepping into bed. Walking on the bed results in soil compaction, which is something you want to avoid.
Mark the outline of a 4ft x 8ft rectangle on the ground. Place sandbags in a single file on all sides, making sure that the corners have a snug fit. Now, build a second layer and tamp it down.
Line the interior of the bed with cardboard or several layers of newspaper to make a barrier against weeds in the ground. Fill the bed with several layers using high-quality garden soil, grass clippings, crushed leaves, and compost.
2. Raised beds with logs
If you have recently cut down some trees in the property or have old logs lying around, you can build a raised bed in no time. Sourcing straight logs of 1 ft diameter from a local lumberyard is not a bad idea either. Three 8 ft long logs would be sufficient if you have a chainsaw to cut one of them into two 4 ft long pieces for the shorter sides. You can easily get it done in lumberyards.
Mark 4ft x 8ft rectangle on the ground and place the two long logs 4 ft apart and parallel to each other. Place the shorter logs on the remaining two sides. Move the logs slightly towards one another to complete the bed. Wedge a few rocks in the space between the logs and the ground to keep the logs from shifting as you fill the beds. Alternatively, you can use 2 ft long sections of rebar to give strong support to the logs. Hammer them down close to the logs, 2-3 each to every side, until they are flush with the top of the logs.
3. Raised beds with wooden planks
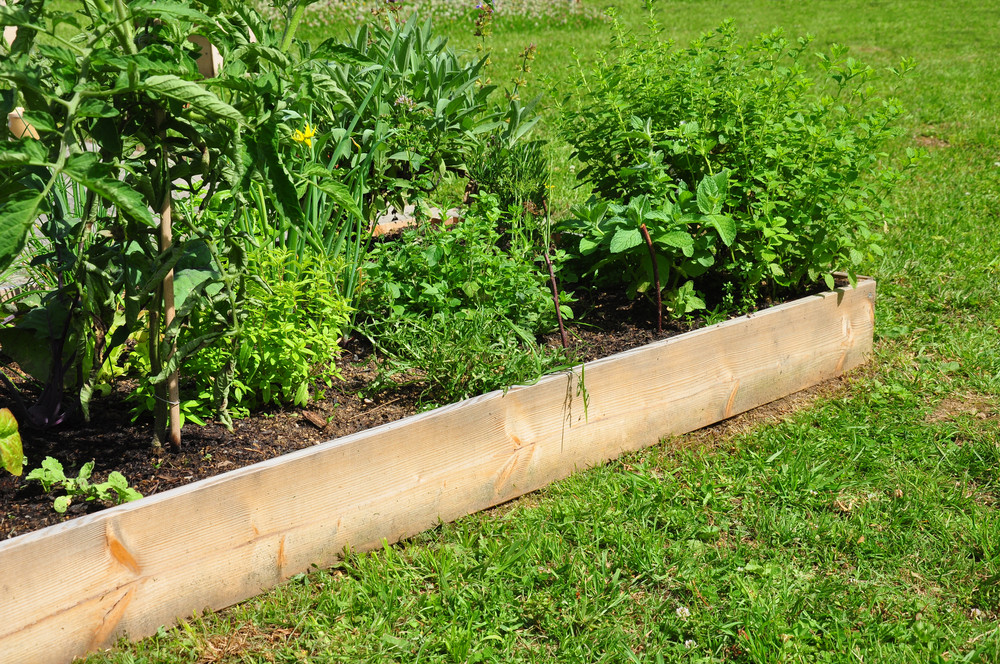
If shifting heavy logs is too much work, build the sides of the beds with wooden planks instead. You will need three 2 by 12 planks measuring 8 ft each; 2 for the long sides and the other one to be cut into two 4ft planks for the other two sides. Remember to use untreated wood only for your vegetable beds.
We are restricting the length of the beds to beds to 8ft and the height to 1 ft here because longer and taller beds would need additional crossbars for extra support. 12 inches of soil is deep enough for most vegetables because the majority of roots are distributed in the first 6 inches of soil. Only a few would venture into the remaining 6 inches. The bottom of the raised bed remains open as the cardboard and paper disintegrates, so any vigorous roots can find their way into deeper soil, if necessary.
You will need 2ft sections of rebar to support the wooden planks on the outside. Mark the 4×8 outline on the ground. Hammer down the rebar sections deep into the ground, 3 each on the long sides and 2 each on the short sides, until only 10 inches of them remain above the ground. Stand the planks on their edges and arrange them against the rebar stumps. You will have some overlap at the corners, so adjust the planks to make a snug fit. Hold the planks in place with rocks until you fill the bed.
4. Raised beds with concrete block edging
Concrete blocks make an interesting edging because they have 2 or more little pockets that you can use for growing herbs or ornamentals. 8” by 8” by 16” is a convenient size to use, and you will need 16 such blocks to make a single layer bed 8 inches tall.
After marking the outline, place two blocks end to end to form one of the shorter sides. It will be less than 3 ft long now. Place one block each at right angles at both ends to form the corners. Now, this side will measure 4 ft on the outside. Continue arranging the blocks along the longer side until you get to the last two blocks which will form the short side at the far end. The heavy concrete blocks should stay in place when filled in, but you can drive down a few rebar sections along the periphery for extra support.
If you use cured compost and soil to fill up the beds, you can start planting them immediately. A few weeks of curing helps if farmyard manure, fresh leaves, and grass clippings are used along with compost.